
Ginger Tea: A Natural Remedy for Period Bloating – An Indian Youth’s Guide
Menstrual cycles can be challenging, with cramps, mood swings, and the infamous bloating making it hard to function at your best.
If you’re an Indian youth juggling studies, work, and social commitments, the added discomfort of period bloating can feel like an unwelcome guest. But what if the solution lies in your kitchen?
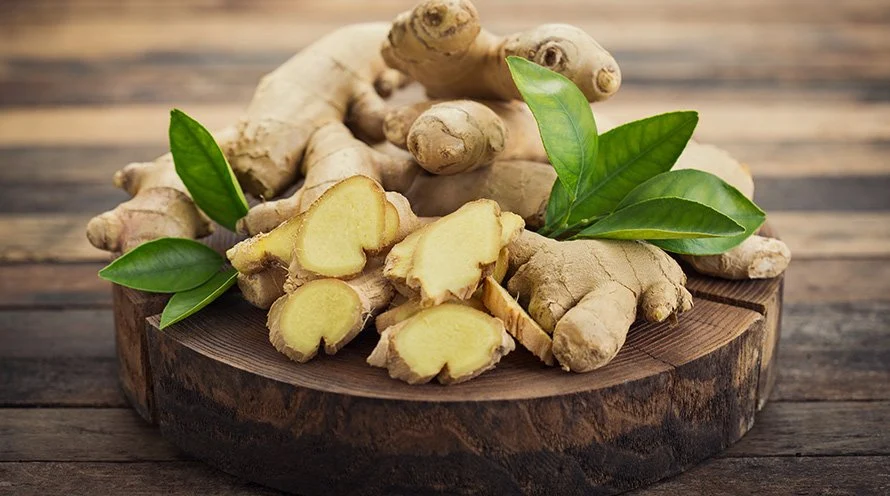
According to age-old wisdom—something our mothers have always known—ginger tea is a simple, effective remedy for easing period bloating.
This blog delves into why ginger tea is a go-to solution for menstrual bloating and how it aligns with the lifestyle of Indian youth. Let’s explore how this golden elixir can make your period days a little easier.
Understanding Period Bloating
Period bloating occurs due to hormonal fluctuations, particularly increased levels of estrogen and progesterone. These hormones cause water retention, which leads to a feeling of puffiness or tightness, especially around the abdomen.
While bloating is a normal part of the menstrual cycle, it can be uncomfortable and frustrating.
Why Do Indian Youth Face More Challenges?
As a young Indian, you may already have a hectic lifestyle, balancing academics, work, or other responsibilities. Add to this the cultural expectations and dietary habits that sometimes lean heavily on processed foods, salt, or caffeine—all of which can exacerbate bloating.
Furthermore, in many Indian households, discussing menstruation with male family members is still considered taboo. Some deeply ingrained cultural practices also restrict women during their menstrual cycle, such as not allowing them to enter the kitchen or sleep in a proper bed.
These emotionally distressing practices can, in turn, cause stress, leading to the release of cortisol, a stress hormone that worsens physical discomfort, including bloating.
This is where natural remedies like ginger tea can make a significant difference.
Why Ginger Tea Works Wonders for Period Bloating
1. Anti-inflammatory Properties
Ginger contains powerful anti-inflammatory compounds called gingerols and shogaols. These help reduce the inflammation in the gut, relieving bloating and soothing abdominal discomfort.
2. Promotes Digestive Health
Bloating often stems from digestive issues like slow metabolism or gas buildup. Ginger tea stimulates the digestive enzymes, aiding in faster digestion and reducing gas.
3. Diuretic Effect
Ginger tea has mild diuretic properties that help flush out excess water from the body, reducing water retention and puffiness.
4. Hormonal Balance
Ginger may also play a role in regulating hormones, helping reduce the severity of period symptoms, including bloating, cramps, and mood swings.
5. Warmth and Comfort
A hot cup of ginger tea provides warmth and relaxation, which can ease period discomfort and elevate your mood during challenging days.
Ginger Tea for Period Bloating: Step-by-Step Approach with External Resources
Here’s how you can implement ginger tea as a remedy for period bloating, broken down into actionable steps. Additionally, external links provide deeper insights and credibility.
Step 1: Understand the Science Behind Ginger and Menstrual Health
Before diving into remedies, it’s helpful to understand why ginger is effective for bloating and menstrual discomfort. Research confirms its anti-inflammatory, digestive, and hormone-regulating properties.
External Resources:
Step 2: Gather Ingredients
Head to your kitchen or a local grocery store to gather the following ingredients:
- Fresh ginger root
- Water
- Optional: honey, lemon, or additional spices like cardamom
External Resources:
- BBC Good Food: Why Fresh Ginger Is Better Than Powder
- Times of India: Ginger Benefits in Indian Cooking
Step 3: Prepare Ginger Tea
Follow this quick recipe:
- Boil 2 cups of water in a pan.
- Grate or thinly slice 1-2 inches of fresh ginger.
- Add the ginger to the boiling water and let it simmer for 5-7 minutes.
- Strain the tea into a cup.
- Add a teaspoon of honey or a squeeze of lemon for extra flavor.
External Resources:
Step 4: Drink Responsibly
Consume ginger tea once or twice a day during your menstrual cycle. Avoid drinking excessive amounts, as it can lead to acidity or heartburn in some individuals.
External Resources:
Step 5: Pair Ginger Tea with Lifestyle Adjustments
For maximum relief, complement ginger tea with:
- Hydration: Drink at least 2-3 liters of water daily.
- Diet: Include fiber-rich foods and avoid salty snacks.
- Light Exercise: Try yoga or gentle stretching exercises.
External Resources:
Step 6: Monitor the Results
Keep track of how ginger tea affects your period symptoms over a few cycles. If the bloating significantly reduces, incorporate it into your routine. However, if symptoms persist, consult a healthcare provider.
External Resources:
- WebMD: When to See a Doctor for Menstrual Symptoms
- National Library of Medicine: Gut Health and Hormonal Cycles
Quick Overview of the Steps to Use Ginger Tea for Period Bloating
- Understand the Science Behind Ginger
Ginger’s anti-inflammatory and digestive properties make it effective for easing period bloating. Its ability to regulate hormones also helps reduce discomfort during your menstrual cycle. - Gather the Ingredients
You’ll need fresh ginger root, water, and optional ingredients like honey, lemon, or cardamom for added flavor. - Prepare Ginger Tea
Boil 2 cups of water, add grated or sliced ginger, and let it simmer for 5-7 minutes. Strain into a cup and add honey or lemon if desired. - Drink Responsibly
Drink ginger tea once or twice a day during your period, but avoid overconsumption to prevent acidity or heartburn. - Pair with Lifestyle Adjustments
Stay hydrated, eat fiber-rich foods, and engage in light exercise like yoga to enhance the effectiveness of ginger tea in reducing bloating. - Monitor the Results
Track how your symptoms change over a few cycles. If bloating decreases, continue using ginger tea. If symptoms persist, consult a healthcare provider.
By following these simple steps, you can naturally manage period bloating and stay connected to time-tested, culturally rooted remedies.
When and How Often Should You Drink Ginger Tea?
For best results, drink ginger tea:
- 1-2 times a day during your menstrual cycle, especially when bloating is at its peak.
- First thing in the morning on an empty stomach or in the evening for a calming effect.
Avoid overconsumption, as too much ginger can sometimes cause heartburn or acidity.
The Cultural Connection: Wisdom Passed Down
In Indian households, natural remedies like ginger tea have been trusted for generations. Whether it’s curing a sore throat or soothing an upset stomach, ginger holds a revered place in Ayurvedic medicine. Our mothers and grandmothers often know the value of these age-old practices, even when modern science is just catching up.
As Indian youth, incorporating these traditional remedies into your lifestyle allows you to stay connected to your roots while addressing modern-day health challenges.
Why Ginger Tea Fits the Lifestyle of Indian Youth
- Quick and Easy to Prepare: With minimal ingredients and effort, ginger tea can be made in minutes, making it perfect for busy students or young professionals.
- Affordable and Accessible: Ginger is readily available in most Indian kitchens, making this remedy cost-effective and convenient.
- Customizable Flavor: You can experiment with add-ons like cardamom, cinnamon, or tulsi to suit your taste preferences.
- Holistic Wellness: Beyond bloating, ginger tea helps with cramps, nausea, and even stress—common challenges faced by Indian youth.
Additional Tips to Combat Period Bloating
While ginger tea is an excellent remedy, combining it with a healthy lifestyle can enhance its effects:
- Stay Hydrated: Drink plenty of water to prevent water retention.
- Reduce Salt Intake: Avoid salty snacks, which can worsen bloating.
- Eat Fiber-Rich Foods: Include fruits, vegetables, and whole grains in your diet to promote digestion.
- Exercise Gently: Yoga and light stretches can help alleviate bloating and cramps.
- Limit Caffeine: Replace coffee with herbal teas like ginger, chamomile, or peppermint during your period.
Conclusion: A Cup of Comfort
Ginger tea is more than just a beverage—it’s a cup of comfort, offering relief from period bloating and other menstrual woes. As an Indian youth navigating the complexities of modern life, embracing this traditional remedy can be a game-changer for your overall well-being.
The next time your period brings along bloating, listen to your mom’s advice and brew yourself a warm, soothing cup of ginger tea. It’s a small act of self-care that can make a big difference.
So, why wait? Give ginger tea a try and experience its magical benefits for yourself!
Disclaimer:
The information provided in this blog is intended for general informational purposes only. While ginger tea has been traditionally used in Ayurvedic medicine and has some proven health benefits, it should not be considered a substitute for professional medical advice, diagnosis, or treatment. Always consult with a healthcare provider before making any significant changes to your diet, especially if you have underlying health conditions or are taking medications.
Individual results may vary, and excessive consumption of ginger can lead to side effects such as heartburn or gastrointestinal discomfort. Please consume ginger tea in moderation.
The external resources linked in this article are for reference purposes and do not necessarily reflect the views or recommendations of the author.
-
Drinking kombucha tea can soothe your stomach woes, says my mom
The Secret of Kombucha Tea to Cure Stomach Pain: A Refreshing Remedy Backed by Science
Kombucha tea, a fermented drink made from sweetened tea and a symbiotic culture of bacteria and yeast (SCOBY), has been gaining attention in the wellness world.
One of the key benefits touted by many is its ability to soothe stomach pain and improve digestion. But how exactly does it work, and what is the scientific backing behind its digestive benefits?
The Science Behind Kombucha’s Soothing Effect on Stomach Pain
Kombucha is rich in probiotics, which are beneficial bacteria that help balance the gut microbiome. A healthy gut microbiome is essential for proper digestion and immune function. The probiotics in kombucha can help restore the balance of good bacteria in the gut, which may reduce bloating, gas, and discomfort associated with digestive issues.
Kombucha also contains acetic acid, which is formed during fermentation and has been shown to have antimicrobial properties. This may help in neutralizing harmful bacteria in the digestive tract, contributing to an overall healthier stomach environment.
Additionally, kombucha is a source of organic acids, enzymes, and bioactive compounds that may support the breakdown of food in the stomach and enhance nutrient absorption. Some studies have suggested that the polyphenols and antioxidants present in kombucha, particularly from green or black tea, can also reduce inflammation, which is often a root cause of digestive discomfort.
How to Make Kombucha Tea: A Simple Recipe
Ingredients:
- 1 cup of organic black or green tea (loose leaf or tea bags)
- 1 cup of white sugar (for fermentation)
- 1 SCOBY (Symbiotic Culture of Bacteria and Yeast)
- 4 cups of water
- 1 cup of unflavored kombucha (from a previous batch or store-bought to start the fermentation)
Instructions:
- Prepare the Tea: Boil 4 cups of water. Add the tea and let it steep for about 10 minutes. Afterward, remove the tea bags or strain out the loose leaves.
- Add Sugar: Stir in 1 cup of sugar into the hot tea until it completely dissolves. Allow the tea to cool to room temperature.
- Fermentation: Once the tea has cooled, pour it into a glass jar (about 1 quart in size). Add 1 cup of starter kombucha and then gently place the SCOBY into the jar.
- Cover and Ferment: Cover the jar with a clean cloth or paper towel and secure it with a rubber band. Let the tea ferment at room temperature for 7-14 days, depending on the taste you prefer. The longer it ferments, the more tangy and acidic it will become.
- Bottle and Enjoy: After fermentation, remove the SCOBY and store it for your next batch. You can bottle the kombucha and refrigerate it. Some people like to add fruits or herbs for flavor before bottling.
Note: If you are new to kombucha, start with small amounts (about 4 ounces a day) to allow your body to adjust to the probiotics and avoid potential stomach upset.
When Not to Take Kombucha
While kombucha can offer significant health benefits, there are certain situations where it might not be suitable:
- Sensitivity to Caffeine or Sugar: Kombucha contains small amounts of caffeine from the tea and sugar used during fermentation. If you’re sensitive to either of these, it may cause discomfort or agitation.
- Weakened Immune System: If you have a compromised immune system or a serious underlying health condition, the probiotics in kombucha may not be suitable, as they could cause an adverse reaction.
- Digestive Issues (Severe): If you suffer from severe gastrointestinal issues, such as Crohn’s disease or ulcerative colitis, kombucha may cause bloating, gas, or irritation due to its fermentation and acidity. Always consult a doctor before introducing it to your diet.
- Pregnancy and Breastfeeding: While kombucha is generally considered safe for most people, pregnant or breastfeeding women should consult their healthcare provider before consuming it regularly, as the alcohol content from fermentation, though minimal, might be a concern.
Final Thoughts
Kombucha tea can be a soothing and refreshing way to support your digestive health, thanks to its probiotic content and other beneficial compounds. By balancing your gut microbiome and providing organic acids, kombucha has the potential to ease stomach discomfort. However, as with any health remedy, it’s essential to be mindful of your personal health status and consult a healthcare professional when in doubt.
With the simple recipe above, you can try making kombucha at home, tailoring it to your taste preferences while enjoying its digestive benefits. So, next time you’re feeling bloated or dealing with stomach pain, reach for a glass of kombucha and give your gut the support it needs!
Click here for other home remedies.
Citations:
- Health Benefits of Kombucha:
- Homemade Kombucha Recipes:
- Scientific Research on Kombucha:
- Expert Opinions:
-

9 Mindfulness breathing steps to keep monday blues at bay.
Introduction
Let’s be real here—Monday blues are the worst. Whether you’re in school or working, the sense of dread from emails to tackle and deadlines to meet can feel overwhelming, making us want to crawl back into bed. But that’s not the best solution.
Let me share a breathing ritual that has been an absolute gem for me. I’ll walk you through the 9 steps I took to overcome procrastination and demotivation. If it worked for me, it can work for you too. So, let’s dive in!
Step-by-Step Approach to Mindful Breathing to Beat Monday Blues (Detailed Guide):
- Find a Quiet Space
- Why It’s Important: A calm environment helps you avoid distractions and connect deeply with your breathing. Noise or interruptions can pull your attention away and reduce the effectiveness of mindful breathing.
- How to Do It: Choose a place where you feel at ease—this could be your bedroom, a quiet corner of your house, or even your car before heading into work. Ensure it’s free from interruptions like phone notifications or loud noises.
- Set a Timer
- Why It’s Important: Knowing when to stop allows you to fully immerse yourself in the practice without worrying about keeping track of time. It also ensures you commit to the exercise for a meaningful duration.
- How to Do It: Use your phone or a small timer to set 5–10 minutes. If you’re new to mindful breathing, start with 5 minutes and gradually increase as you become more comfortable.
- Close Your Eyes
- Why It’s Important: Closing your eyes minimizes external distractions and helps you focus inward, creating a sense of calm.
- How to Do It: Let your eyelids gently close without forcing them. If you’re in a public place and closing your eyes feels uncomfortable, you can lower your gaze instead.
- Take a Deep Breath In
- Why It’s Important: Deep breathing activates your parasympathetic nervous system, which helps lower stress and calms your body. Focusing on the inhale brings your attention to the present moment.
- How to Do It: Inhale deeply through your nose for a count of four. Pay attention to how your belly rises, not just your chest. Let the air fill your lungs completely, imagining energy and positivity flowing in with your breath.
- Hold the Breath
- Why It’s Important: Pausing after the inhale helps center your thoughts and slows down your breathing rhythm, promoting relaxation.
- How to Do It: Hold your breath for a count of four. This pause doesn’t need to feel forced—keep it natural. Focus on the stillness in this moment.
- Exhale Slowly
- Why It’s Important: The exhale releases tension from your body and mind. Exhaling slowly stimulates the vagus nerve, which is associated with calming your stress response.
- How to Do It: Breathe out gently through your mouth for a count of six, making a soft “whoosh” sound. Imagine letting go of worries, frustration, or tension as the air leaves your body.
- Repeat the Cycle
- Why It’s Important: Repetition creates a rhythm that helps deepen relaxation and strengthens your focus. This is where the magic of mindfulness happens.
- How to Do It: Continue the inhale-hold-exhale cycle for the duration of your timer. If your thoughts start to wander—which is completely normal—gently guide your focus back to the sensation of your breath. You can even silently say “in” as you inhale and “out” as you exhale to anchor your mind.
- Visualize Positivity
- Why It’s Important: Adding visualization to your breathing practice enhances its emotional benefits, helping you replace stress and negativity with optimism and energy.
- How to Do It: As you inhale, imagine breathing in bright, warm light that fills you with confidence, energy, and positivity. On the exhale, picture releasing a dark mist that represents stress, doubts, and negativity leaving your body.
- End with Gratitude
- Why It’s Important: Ending your practice with gratitude shifts your mindset toward positivity, leaving you feeling uplifted and ready to face the day.
- How to Do It: Once the timer goes off, take a moment to acknowledge your effort. Open your eyes slowly, stretch if needed, and reflect on three things you’re grateful for—these could be simple things like the warmth of your blanket, a supportive friend, or the smell of your morning coffee.
By following these detailed steps, mindful breathing becomes a structured and intentional tool to calm your mind and uplift your spirit, turning your Monday blues into a productive, positive start to the week.
Conclusion
Monday blues don’t have to dictate your week. By dedicating just a few minutes to mindful breathing, you can reclaim control over your mood, ease stress, and foster a sense of calm and readiness for the tasks ahead. The beauty of this practice lies in its simplicity—it requires no special equipment, only your willingness to pause and breathe.
That said, I can’t assure you that you’ll always be satisfied with this technique. There are people who may not be the best candidates for meditation, and that’s totally fine. You can try different methods like running, listening to music, or anything else that energizes you.
One important thing to note is that mindful breathing isn’t a quick fix. It’s a practice that should be done consistently and with intention so that, over time, you can truly notice the change in your attitude and outlook.
- Find a Quiet Space
-

Apricot | Simple and effective solution for glowing skin, says mom.
Discover the Magic of Apricot for Glowing Skin: A Natural and Chemical-Free Remedy
Introduction: Why We Care About Our Skin
As teenagers or young adults, it’s natural to be concerned about our appearance. Whether we want to attract someone or simply feel good about ourselves, having healthy, glowing skin can make a huge difference. The beauty industry offers countless products promising radiant skin, but many of these are filled with chemicals that could potentially harm your skin in the long run.
Reading labels, researching ingredients, and avoiding harmful chemicals can be overwhelming, not to mention expensive. Sometimes, we just want something simple, effective, and affordable—a remedy that works wonders without the added baggage of side effects. That’s where traditional wisdom comes in.
One of the most powerful natural remedies I’ve ever come across is something my mother taught me when I was little: an apricot-based skincare treatment. In Hindi, apricot is known as “khubani”, and this humble fruit is packed with skin-nourishing properties. It’s easily available, budget-friendly, and most importantly, completely natural.
In this blog, I’ll take you through the benefits of apricot for the skin, how to use it effectively, and some additional tips for radiant, healthy skin.
Why Choose Apricot for Skincare?
Apricot is a superfruit when it comes to skincare, offering a plethora of benefits:
- Rich in Antioxidants: Apricots are loaded with vitamins A, C, and E, which protect the skin from free radical damage and slow down the aging process.
- Gentle Exfoliation: The natural enzymes and fine granules in apricots make them an excellent exfoliating agent, removing dead skin cells without causing irritation.
- Hydration Booster: Apricots are rich in water content and natural oils, which help lock in moisture, leaving the skin soft and supple.
- Skin Brightening: The high vitamin C content in apricots helps reduce dark spots and pigmentation, giving the skin a natural glow.
- Anti-Inflammatory Properties: Apricots can help soothe skin irritation, reduce redness, and calm acne-prone skin.
- Natural Glow: Regular use of apricot-based remedies can improve skin tone and texture, making it look fresh and youthful.
Who Should Avoid Apricot Remedies?
While apricot-based remedies work wonders for many, they may not be suitable for everyone. Here’s who should be cautious:
- Allergic Individuals:
- If you have a known allergy to apricots or other stone fruits (like peaches, plums, or cherries), avoid using apricot-based products.
- Highly Sensitive Skin:
- If your skin is prone to irritation or reacts negatively to natural acids, test the remedy on a small patch of skin first.
- Open Wounds or Severe Acne:
- Avoid using apricot scrubs or masks on areas with open cuts, wounds, or severe acne, as the granules might aggravate the condition.
- Specific Skin Conditions:
- People with eczema, rosacea, or psoriasis should consult a dermatologist before using any new remedy, including natural ones.
When to Consult a Doctor
While natural remedies can work wonders, they are not a substitute for medical treatment. Here are some situations where you should seek professional advice:
- Persistent Skin Issues:
- If you have chronic acne, hyperpigmentation, or other skin conditions that don’t improve with home remedies.
- Severe Reactions:
- If you experience redness, itching, or swelling after using apricot remedies, stop immediately and consult a dermatologist.
- Underlying Health Concerns:
- Sometimes, skin issues are a reflection of internal health problems such as hormonal imbalances, nutrient deficiencies, or allergies. A doctor can help identify and address these root causes.
- Customized Skincare:
- If you’re unsure about what works best for your skin type, a dermatologist can guide you toward the right treatments.
Disclaimer
This blog is for informational purposes only and should not be considered medical advice. Natural remedies like the apricot treatment may provide excellent results, but they are not guaranteed to work for everyone. Always consult a healthcare professional or dermatologist before trying new remedies, especially if you have sensitive skin, allergies, or underlying medical conditions.
The Apricot Remedy: How to Make and Use It
Let’s dive into the simple apricot-based remedy my mother taught me. This natural treatment can be used as a face scrub, mask, or even as a moisturizing serum.
Ingredients:
- 3 fresh apricots (or dried apricots if fresh ones aren’t available)
- 1 tablespoon of honey
- 1 teaspoon of yogurt
- A few drops of rose water
- Optional: A pinch of turmeric (for additional anti-inflammatory benefits)
Steps to Prepare:
- Prepare the Apricots:
- If you’re using fresh apricots, wash them thoroughly, remove the seeds, and scoop out the pulp.
- If you’re using dried apricots, soak them in warm water for 30 minutes to soften them, then blend them into a smooth paste.
- Mix the Ingredients:
- In a small bowl, combine the apricot pulp with honey, yogurt, and rose water. Add a pinch of turmeric if desired.
- Mix until the ingredients form a smooth, creamy consistency.
- Apply the Mask:
- Cleanse your face with lukewarm water to open up your pores.
- Apply the apricot mask evenly across your face and neck, avoiding the eye area.
- Relax and Let It Work:
- Leave the mask on for 15–20 minutes. Use this time to relax, meditate, or listen to your favorite playlist.
- Exfoliate and Rinse:
- Before washing it off, gently massage your skin in circular motions to exfoliate.
- Rinse with lukewarm water and pat your skin dry with a soft towel.
- Moisturize:
- Follow up with a natural moisturizer or a few drops of almond or coconut oil for added hydration.
The Science Behind Apricot Skincare
To understand why this remedy works so well, let’s take a closer look at the nutrients found in apricots:
- Vitamin A (Retinol):
- Helps reduce acne and promotes skin cell regeneration.
- Vitamin C:
- Brightens skin, reduces dark spots, and boosts collagen production.
- Vitamin E:
- Provides deep hydration and protects the skin from UV damage.
- Natural Enzymes:
- These gently exfoliate and remove dead skin cells, revealing a brighter complexion.
- Essential Fatty Acids:
- Found in apricot kernel oil, these nourish the skin and improve elasticity.
Conclusion
The beauty of apricot-based remedies lies in their simplicity, effectiveness, and affordability. By using natural ingredients like apricots, honey, and yogurt, you can achieve glowing, healthy skin without exposing yourself to harmful chemicals. However, it’s important to recognize when natural remedies are enough and when professional help is needed.
Always listen to your skin and seek advice from a dermatologist when necessary. With the right balance of natural remedies, proper skincare, and medical guidance, you’ll be well on your way to achieving radiant, youthful skin.
Relevant links:


Leave a Reply