A Mosquito Bite Solution Passed Down Through Generations
It can sometimes be incredibly difficult to sit on the balcony and enjoy the city view when you’re constantly distracted by the buzzing sound of mosquitoes around you. Personally, I’m not a fan of using chemical remedies to tackle this issue—I’m uncertain about the potential harm they may cause in the pursuit of comfort.
One of the most well-known ingredients used in my home to control mosquitoes was lemongrass oil. I can still vividly remember its refreshing aroma.
In this blog, we’ll explore the science, application, and broader uses of lemongrass oil to help prevent mosquito bites and soothe the irritation they cause.
The Science Behind How It Prevents Mosquito Bites
Lemongrass oil is extracted from a plant called Cymbopogon, and no—it’s not a combination of lemon and grass (as I mistakenly believed a few years ago). This plant is packed with potent components like citral and geraniol, which contribute to its effectiveness as a natural mosquito remedy.
Key Natural Properties of Lemongrass Oil
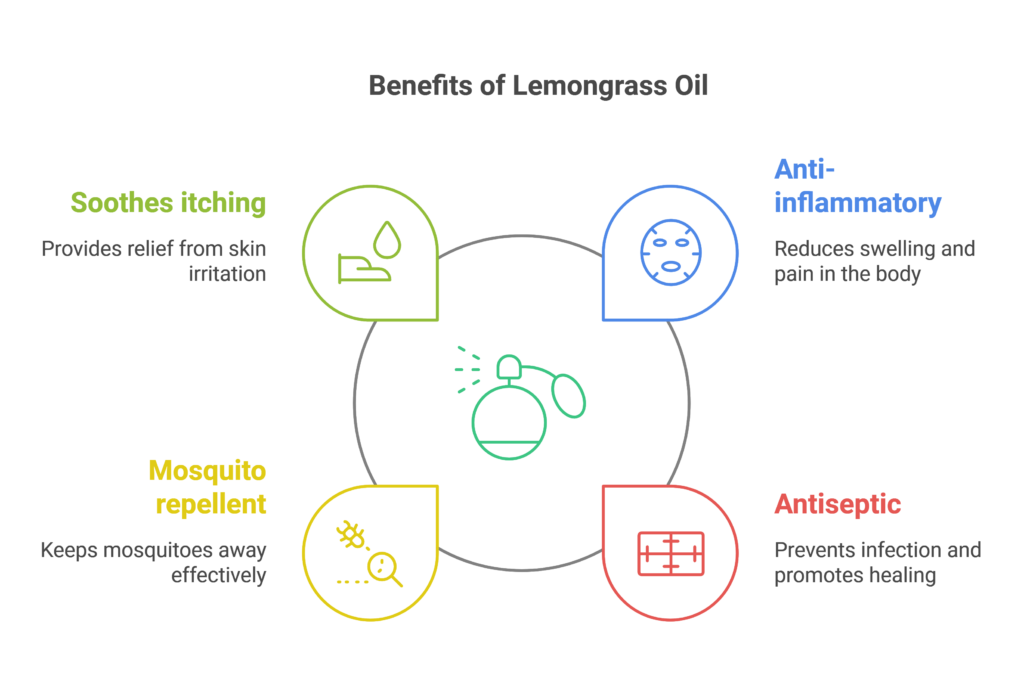
Anti-Inflammatory: Reduces redness, swelling, and irritation caused by mosquito bites.
Antiseptic: Keeps the bite area clean, preventing infections.
Cooling Effect: Provides immediate relief from itching and discomfort.
Mosquito Repellent: Effectively deters mosquitoes, minimizing further bites.
Lemongrass oil has been a part of my family’s natural remedies for generations, and I hope this blog helps you rediscover its benefits too!
Scientific Backing
There are numerous studies and research journals that confirm the anti-inflammatory and antimicrobial properties of lemongrass oil. It has been found to be as efficient as some chemical alternatives but with significantly fewer side effects.
How to Use Lemongrass Oil for Mosquito Bites
Step 1: Choose Your Carrier Oil
For those unfamiliar with lemongrass oil, it is often sold in a highly concentrated form in retail stores. Because of its potency, it’s essential to dilute it with a carrier oil before application.
Here are some commonly used carrier oils:
Coconut Oil: Provides moisturizing and antimicrobial benefits.
Jojoba Oil: Perfect for sensitive skin, as it mimics the skin’s natural oils.
Argan Oil: A great option for oily or acne-prone skin due to its lightweight texture.
Diluting lemongrass oil not only ensures safe application but also enhances its benefits by combining it with the properties of the carrier oil.
Step 2: Prepare and Apply
Take a few drops of lemongrass oil and mix it with 1 teaspoon of your chosen carrier oil.
After cleaning the affected area with soap and water, gently massage the mixture onto the mosquito bite. The soothing properties of the oil will begin to work almost immediately, providing relief from itching and discomfort.
Step 3: Reapply as Needed
There’s no fixed regimen for how often this remedy should be used. However, as a rule of thumb, you can reapply the oil blend whenever there is persistent itching or irritation—up to three times a day for best results.a rule of thumb would be to used, when their is persisitent itching, reapply the oil blend up to three times a day.
Beyond Mosquito Bites: Multipurpose Uses of Lemongrass Oil
Lemongrass oil is versatile and offers numerous benefits:
Aromatherapy: Diffuse it to alleviate stress and promote relaxation.
Natural Mosquito Repellent: Mix with water to create a DIY spray for your home or skin.
Skincare: Use it to soothe acne, fungal infections, or minor skin irritations.
Digestive Health: Ingestible-grade lemongrass oil (only with proper guidance) may help with bloating and indigestion.
FAQs About Lemongrass Oil
1. Can I use lemongrass oil directly on my skin? No, always dilute it with a carrier oil to avoid irritation or sensitivity.
2. What’s the difference between lemongrass oil and citronella oil? While both repel mosquitoes, citronella oil focuses on prevention, whereas lemongrass oil offers additional healing and anti-inflammatory benefits.
3. Can lemongrass oil be used on kids or pets? Consult a pediatrician or veterinarian before applying lemongrass oil to children or animals, as it can be too potent for them.
When to See a Doctor
While lemongrass oil is effective for mild bites, seek medical attention if you notice:
Severe swelling or redness.
Pus, warmth, or other signs of infection.
Systemic symptoms like fever or difficulty breathing.
Final Thoughts
Lemongrass oil, a remedy celebrated in both traditional wisdom and scientific research, is a safe, natural, and effective solution for mosquito bites. With its anti-inflammatory and antiseptic properties, it not only soothes but also heals. Whether you’re dealing with an itchy bite or seeking a multipurpose oil for your wellness routine, lemongrass oil is a must-have.
Disclaimer
This article is for informational purposes only and does not substitute professional medical advice. Always perform a patch test before use and consult a healthcare provider for specific concerns.
Say Goodbye to Digestive Woes with Curry Leaves: The Authentic Guide
If you’ve ever felt sluggish, bloated, or uncomfortable after a meal, you’re not alone. Indigestion is a common issue that can make eating a challenge. But what if a simple, natural remedy was right in your kitchen, ready to help soothe your digestive woes?
Most of us are familiar with the wonder leaf used in Indian cuisine, which Indians refer to as Karripatha or curry leaves. These small green leaves are sometimes overlooked, but they are incredible at curing digestive issues. This might be why they are so popular in all parts of India. I still remember the curry leaf tree in the backyard of our house.
The Power of Curry Leaves for Digestion
Curry leaves, also known as Murraya koenigii (scientific name), are a staple in Indian kitchens. They not only add a distinct aroma and flavor to dishes but have been valued in traditional medicine for their various health benefits. Among these, digestive health stands out as one of their most significant attributes.
Recent studies and centuries-old Ayurvedic practices show that curry leaves can be incredibly effective in supporting digestive health. Here’s how:
1. Rich in Nutrients for Digestive Support
Curry leaves are packed with essential nutrients, including vitamins A, B, C, and minerals like calcium and iron. These nutrients not only nourish your body but also promote healthy digestion by improving gut motility, reducing acid reflux, and regulating bowel movements.
2. Prevents Constipation
One of the most common digestive issues is constipation, which can leave you feeling uncomfortable and sluggish. Curry leaves are known for their laxative properties, which help in improving bowel movements. They can relieve constipation by stimulating the digestive system and facilitating the passage of stools.
3. Treats Indigestion and Acidity
Indigestion, characterized by bloating, discomfort, and acid reflux, is a widespread problem. Curry leaves have been traditionally used to treat indigestion by increasing digestive enzyme production, which helps break down food more efficiently. Additionally, curry leaves help in neutralizing gastric acid and alleviating acidity.
4. Aids in Detoxification
Curry leaves help detoxify the body by supporting liver function. The liver plays a crucial role in digestion by processing toxins and ensuring the smooth breakdown of fats. Curry leaves can help in flushing out toxins and promoting overall digestive health, keeping your system clean and functioning optimally.
5. Improves Appetite and Digestion
Curry leaves are known to stimulate the production of bile, which aids in the digestion of fats. They also help to enhance appetite, making them useful for those who struggle with low appetite due to digestive problems or illness.
6. Antioxidant and Anti-inflammatory Properties
The antioxidants in curry leaves help reduce inflammation in the gut, promoting overall digestive well-being. They also prevent oxidative stress, which can damage the digestive system and lead to chronic conditions such as irritable bowel syndrome (IBS).
How to Incorporate Curry Leaves into Your Routine
To get the most benefits from curry leaves, you don’t need to do anything extravagant. There are simple and easy ways to add curry leaves to your diet:
Curry Leaf Tea: A traditional remedy for digestive issues. Boil a handful of curry leaves in water for a few minutes, strain, and drink the tea.
Curry Leaf Powder: You can dry curry leaves and grind them into a powder. Add this powder to warm water or mix it into your food to promote digestion.
Add to Dishes: Curry leaves are commonly used in curries, dals, and soups. Simply add fresh curry leaves to your cooking to enjoy their digestive benefits.
Curry Leaf Oil: For external use, curry leaf oil can be massaged onto the abdomen for soothing relief from bloating and indigestion.
Scientific Backing for Curry Leaves and Digestion
Several studies have validated the benefits of curry leaves for digestive health. One such study published in the Journal of Ethnopharmacology found that curry leaves have a beneficial effect on gastrointestinal health, reducing inflammation and promoting healing. Their antimicrobial and anti-inflammatory properties make them effective in combating digestive issues like indigestion, bloating, and constipation.
Furthermore, curry leaves contain compounds like alkaloids and flavonoids, which contribute to their digestive benefits by improving gut health and alleviating discomfort.
The Cultural Significance of Curry Leaves in Indian Medicine
In Ayurveda, curry leaves have been used for centuries to treat various ailments, including digestive issues. Known as “Karipatta” in Hindi, curry leaves are a staple in Ayurvedic treatments and are thought to possess a range of healing properties, including those that benefit the stomach and intestines.
Ayurvedic practitioners recommend curry leaves for balancing the doshas (Vata, Pitta, and Kapha) and promoting digestive fire or Agni, which is central to good digestion and overall health.
Conclusion: Say Goodbye to Digestive Woes with Curry Leaves
Curry leaves are not just a flavorful addition to your meals; they’re a powerful ally in improving your digestive health. Whether you’re dealing with bloating, indigestion, or constipation, incorporating curry leaves into your daily routine can provide significant relief. Backed by both tradition and scientific research, curry leaves are a natural remedy that deserves a place in every kitchen.
Remember, while curry leaves are a great tool for digestive health, consistency is key. Make them a regular part of your diet and enjoy a smoother, healthier digestion.
Disclaimer:
The information provided in this blog is for general informational purposes only and is not intended as a substitute for professional medical advice, diagnosis, or treatment. While curry leaves have been traditionally used for digestive health and other benefits, individual responses may vary. If you have persistent digestive issues or underlying health conditions, consult a healthcare professional before incorporating any new remedies into your routine. Always use moderation and seek expert guidance when necessary.
6 Home Remedies to Soothe Period Bloating: Natural Ways to Feel Better
Period bloating is a common issue that many women experience during their menstrual cycle. It can leave you feeling heavy, uncomfortable, and sometimes even frustrated. While reaching for over-the-counter medications might seem like the easiest solution, there are several natural remedies you can try to alleviate bloating. These remedies not only provide relief but also contribute to your overall well-being. Let’s explore six effective home remedies that can help soothe period bloating.
As your mom suggested, ginger tea works wonders for bloating. Ginger contains compounds like gingerol and shogaol that help reduce inflammation and relax the gastrointestinal muscles, providing quick relief from bloating. Its natural antispasmodic properties can also ease menstrual cramps.
How to Use:
Boil a cup of water with a few slices of fresh ginger.
Let it steep for 5-7 minutes.
Add a teaspoon of honey for sweetness and enjoy it warm.
Drinking ginger tea 1-2 times a day during your period can significantly reduce bloating and improve digestion.
Fennel seeds are a time-tested remedy for digestive issues, including bloating. They have carminative properties that help expel gas from the digestive tract and reduce bloating. Plus, fennel seeds have a mild diuretic effect, which can help your body shed excess water weight.
How to Use:
Chew on a teaspoon of fennel seeds after meals.
Alternatively, steep a teaspoon of fennel seeds in hot water for 10 minutes to make fennel tea.
This simple remedy can help ease period bloating and improve digestion.
Starting your day with warm water and lemon can do wonders for period bloating. Lemon is rich in vitamin C and acts as a natural diuretic, helping to flush out excess water and reduce bloating. Warm water helps to kickstart your metabolism and soothe your digestive system.
How to Use:
Squeeze half a lemon into a glass of warm water.
Drink it on an empty stomach every morning during your period.
This refreshing drink not only combats bloating but also boosts your immunity and hydrates your body.
Bananas are rich in potassium, which helps balance sodium levels in your body and reduces water retention—a major cause of bloating. They also contain natural sugars that can help curb cravings during your period.
How to Use:
Eat a ripe banana as a snack or add it to your smoothies or oatmeal.
Combining it with yogurt (another bloating remedy) can further enhance its effects.
Including potassium-rich foods like bananas in your diet can help you stay energized and de-bloated.
Peppermint tea is a soothing remedy for bloating and abdominal discomfort. It contains menthol, which relaxes the digestive tract muscles and reduces bloating and cramping. Plus, the cooling effect of peppermint is incredibly refreshing.
How to Use:
Steep a peppermint tea bag or a teaspoon of dried peppermint leaves in hot water for 5-10 minutes.
Sip on the tea after meals or whenever you feel bloated.
This calming tea is a great addition to your period care routine.
6. Cucumber and Watermelon: Hydrating and Refreshing
Cucumber and watermelon are high-water-content foods that help flush out excess sodium from your body, reducing water retention and bloating. They are also rich in antioxidants and vitamins that promote overall health.
How to Use:
Snack on cucumber slices or watermelon chunks during the day.
Add them to your water for a refreshing detox drink.
Staying hydrated with these fruits can significantly reduce bloating and keep you feeling light.
While these home remedies can provide relief, incorporating lifestyle changes can help you manage bloating more effectively:
Stay Hydrated: Drink plenty of water throughout the day to prevent water retention.
Reduce Salt Intake: Avoid high-sodium foods that can worsen bloating.
Exercise Regularly: Gentle yoga or light walking can improve circulation and reduce bloating.
Eat Smaller Meals: Instead of three large meals, opt for smaller, frequent meals to ease digestion.
Avoid Carbonated Drinks: These can cause gas and exacerbate bloating.
Get Adequate Sleep: Poor sleep can disrupt hormonal balance, making bloating worse.
Final Thoughts
Period bloating can be a nuisance, but these natural remedies offer a simple and effective way to manage the discomfort. Incorporate these six home remedies into your routine, and you’ll notice a significant difference in how you feel during your period. Remember, consistency is key, and combining these remedies with a healthy diet and lifestyle can amplify their benefits.
If your bloating persists or becomes severe, consult a healthcare professional to rule out any underlying issues. In the meantime, give these natural remedies a try and say goodbye to period bloating the gentle, natural way!
Disclaimer:
The information provided in this blog is intended for general informational purposes only, it should not be considered a substitute for professional medical advice, diagnosis, or treatment. Always consult with a healthcare provider before making any significant changes to your diet, especially if you have underlying health conditions or are taking medications.
Individual results may vary, and excessive consumption of ginger can lead to side effects such as heartburn or gastrointestinal discomfort. Please consume ginger tea in moderation.
The external resources linked in this article are for reference purposes and do not necessarily reflect the views or recommendations of the author.
Ginger Tea: A Natural Remedy for Period Bloating – An Indian Youth’s Guide
Menstrual cycles can be challenging, with cramps, mood swings, and the infamous bloating making it hard to function at your best.
If you’re an Indian youth juggling studies, work, and social commitments, the added discomfort of period bloating can feel like an unwelcome guest. But what if the solution lies in your kitchen?
According to age-old wisdom—something our mothers have always known—ginger tea is a simple, effective remedy for easing period bloating.
This blog delves into why ginger tea is a go-to solution for menstrual bloating and how it aligns with the lifestyle of Indian youth. Let’s explore how this golden elixir can make your period days a little easier.
Understanding Period Bloating
Period bloating occurs due to hormonal fluctuations, particularly increased levels of estrogen and progesterone. These hormones cause water retention, which leads to a feeling of puffiness or tightness, especially around the abdomen.
While bloating is a normal part of the menstrual cycle, it can be uncomfortable and frustrating.
As a young Indian, you may already have a hectic lifestyle, balancing academics, work, or other responsibilities. Add to this the cultural expectations and dietary habits that sometimes lean heavily on processed foods, salt, or caffeine—all of which can exacerbate bloating.
Furthermore, in many Indian households, discussing menstruation with male family members is still considered taboo. Some deeply ingrained cultural practices also restrict women during their menstrual cycle, such as not allowing them to enter the kitchen or sleep in a proper bed.
These emotionally distressing practices can, in turn, cause stress, leading to the release of cortisol, a stress hormone that worsens physical discomfort, including bloating.
This is where natural remedies like ginger tea can make a significant difference.
Why Ginger Tea Works Wonders for Period Bloating
1. Anti-inflammatory Properties
Ginger contains powerful anti-inflammatory compounds called gingerols and shogaols. These help reduce the inflammation in the gut, relieving bloating and soothing abdominal discomfort.
2. Promotes Digestive Health
Bloating often stems from digestive issues like slow metabolism or gas buildup. Ginger tea stimulates the digestive enzymes, aiding in faster digestion and reducing gas.
3. Diuretic Effect
Ginger tea has mild diuretic properties that help flush out excess water from the body, reducing water retention and puffiness.
4. Hormonal Balance
Ginger may also play a role in regulating hormones, helping reduce the severity of period symptoms, including bloating, cramps, and mood swings.
5. Warmth and Comfort
A hot cup of ginger tea provides warmth and relaxation, which can ease period discomfort and elevate your mood during challenging days.
Ginger Tea for Period Bloating: Step-by-Step Approach with External Resources
Here’s how you can implement ginger tea as a remedy for period bloating, broken down into actionable steps. Additionally, external links provide deeper insights and credibility.
Step 1: Understand the Science Behind Ginger and Menstrual Health
Before diving into remedies, it’s helpful to understand why ginger is effective for bloating and menstrual discomfort. Research confirms its anti-inflammatory, digestive, and hormone-regulating properties.
Consume ginger tea once or twice a day during your menstrual cycle. Avoid drinking excessive amounts, as it can lead to acidity or heartburn in some individuals.
Keep track of how ginger tea affects your period symptoms over a few cycles. If the bloating significantly reduces, incorporate it into your routine. However, if symptoms persist, consult a healthcare provider.
Quick Overview of the Steps to Use Ginger Tea for Period Bloating
Understand the Science Behind Ginger Ginger’s anti-inflammatory and digestive properties make it effective for easing period bloating. Its ability to regulate hormones also helps reduce discomfort during your menstrual cycle.
Gather the Ingredients You’ll need fresh ginger root, water, and optional ingredients like honey, lemon, or cardamom for added flavor.
Prepare Ginger Tea Boil 2 cups of water, add grated or sliced ginger, and let it simmer for 5-7 minutes. Strain into a cup and add honey or lemon if desired.
Drink Responsibly Drink ginger tea once or twice a day during your period, but avoid overconsumption to prevent acidity or heartburn.
Pair with Lifestyle Adjustments Stay hydrated, eat fiber-rich foods, and engage in light exercise like yoga to enhance the effectiveness of ginger tea in reducing bloating.
Monitor the Results Track how your symptoms change over a few cycles. If bloating decreases, continue using ginger tea. If symptoms persist, consult a healthcare provider.
By following these simple steps, you can naturally manage period bloating and stay connected to time-tested, culturally rooted remedies.
When and How Often Should You Drink Ginger Tea?
For best results, drink ginger tea:
1-2 times a day during your menstrual cycle, especially when bloating is at its peak.
First thing in the morning on an empty stomach or in the evening for a calming effect.
Avoid overconsumption, as too much ginger can sometimes cause heartburn or acidity.
The Cultural Connection: Wisdom Passed Down
In Indian households, natural remedies like ginger tea have been trusted for generations. Whether it’s curing a sore throat or soothing an upset stomach, ginger holds a revered place in Ayurvedic medicine. Our mothers and grandmothers often know the value of these age-old practices, even when modern science is just catching up.
As Indian youth, incorporating these traditional remedies into your lifestyle allows you to stay connected to your roots while addressing modern-day health challenges.
Why Ginger Tea Fits the Lifestyle of Indian Youth
Quick and Easy to Prepare: With minimal ingredients and effort, ginger tea can be made in minutes, making it perfect for busy students or young professionals.
Affordable and Accessible: Ginger is readily available in most Indian kitchens, making this remedy cost-effective and convenient.
Customizable Flavor: You can experiment with add-ons like cardamom, cinnamon, or tulsi to suit your taste preferences.
Holistic Wellness: Beyond bloating, ginger tea helps with cramps, nausea, and even stress—common challenges faced by Indian youth.
Additional Tips to Combat Period Bloating
While ginger tea is an excellent remedy, combining it with a healthy lifestyle can enhance its effects:
Stay Hydrated: Drink plenty of water to prevent water retention.
Reduce Salt Intake: Avoid salty snacks, which can worsen bloating.
Eat Fiber-Rich Foods: Include fruits, vegetables, and whole grains in your diet to promote digestion.
Exercise Gently: Yoga and light stretches can help alleviate bloating and cramps.
Limit Caffeine: Replace coffee with herbal teas like ginger, chamomile, or peppermint during your period.
Conclusion: A Cup of Comfort
Ginger tea is more than just a beverage—it’s a cup of comfort, offering relief from period bloating and other menstrual woes. As an Indian youth navigating the complexities of modern life, embracing this traditional remedy can be a game-changer for your overall well-being.
The next time your period brings along bloating, listen to your mom’s advice and brew yourself a warm, soothing cup of ginger tea. It’s a small act of self-care that can make a big difference.
So, why wait? Give ginger tea a try and experience its magical benefits for yourself!
Disclaimer:
The information provided in this blog is intended for general informational purposes only. While ginger tea has been traditionally used in Ayurvedic medicine and has some proven health benefits, it should not be considered a substitute for professional medical advice, diagnosis, or treatment. Always consult with a healthcare provider before making any significant changes to your diet, especially if you have underlying health conditions or are taking medications.
Individual results may vary, and excessive consumption of ginger can lead to side effects such as heartburn or gastrointestinal discomfort. Please consume ginger tea in moderation.
The external resources linked in this article are for reference purposes and do not necessarily reflect the views or recommendations of the author.
A Medical Student’s Guide to Choosing the Perfect iPad: Avoiding Common Mistakes and Maximizing Your Investment
Table of Contents
Introduction
Hey there, future doctors! So you’re thinking about joining the iPad club in med school? That’s fantastic! As a final-year MBBS student myself, I can tell you firsthand that an iPad can be a game-changer. It’s like having a portable library, a high-tech notepad, and a powerful study buddy all rolled into one sleek device.
But hold on! Before you rush to buy the first iPad you see, let’s take a deep dive into the world of iPads for medical students. This comprehensive guide will walk you through everything you need to know, from understanding common mistakes to maximizing your investment and exploring alternatives.
Let’s face it, medical school is a whirlwind of information overload, late nights, and a constant need to be on top of your game. iPads offer a unique blend of features that make them perfect for navigating this challenging journey:
Portability: Carrying heavy textbooks is a thing of the past! With an iPad, you have access to all your study materials in one lightweight device, perfect for those long commutes or crowded lecture halls.
Digital Note-Taking: Say goodbye to messy notebooks and hello to the world of digital note-taking. Apps like Notability or GoodNotes let you annotate PDFs, sketch diagrams, and organize your notes effortlessly.
Powerful Study Tools: Access a wealth of medical apps like Anki for spaced repetition, Complete Anatomy for interactive 3D models, and UpToDate for the latest medical guidelines.
Seamless Integration: If you’re already in the Apple ecosystem, an iPad seamlessly integrates with your iPhone and MacBook, making file sharing and note syncing a breeze.
The rise of online medical education platforms like Marrow, Egurukul, PrepLadder, and Doc Tutorial has significantly transformed the learning landscape for medical students. These platforms offer a wealth of video lectures, question banks, and interactive learning resources, accessible anytime and anywhere. To fully leverage the potential of these platforms, a portable and versatile device like an iPad or tablet becomes essential. These devices provide a larger screen for immersive video viewing, a comfortable platform for extended study sessions, and the flexibility to study on the go. The ability to annotate lecture slides, take handwritten notes, and seamlessly switch between apps further enhances the learning experience, making an iPad or tablet a valuable asset for any medical student utilizing these online platforms.
Common Mistakes to Avoid When Buying an iPad for Med School
We’ve all made impulsive purchases we later regretted. When it comes to an investment like an iPad, it’s crucial to avoid these common pitfalls:
1. Buying the Cheapest iPad Without Checking Compatibility
It’s tempting to go for the most budget-friendly option, but remember, not all iPads are created equal. The entry-level iPad (9th Gen) supports only the first-generation Apple Pencil and basic keyboard cases. While it’s sufficient for basic tasks, it might feel limiting as you progress through your studies and require more advanced features like wireless charging and pressure sensitivity in the Apple Pencil.
2. Overestimating or Underestimating Storage Needs
Storage is often overlooked until you hit that dreaded “Storage Almost Full” notification. Medical apps, eBooks, and high-resolution anatomy images can quickly gobble up storage space. Choosing a model with insufficient storage will lead to constant app offloading and workflow disruptions. On the flip side, opting for the highest storage option when your needs are moderate is simply a waste of money.
Your iPad is going to be your constant companion, traveling from lecture halls to clinics and back. Investing in a durable case is non-negotiable. Accidental drops, spills, or even everyday wear and tear can lead to costly repairs. A shattered screen or dented frame is not only an expense but also a major disruption to your studies.
4. Spending Too Much on High-End Models Without Needing Pro Features
The allure of the latest iPad Pro with its M2 chip and ProMotion display is undeniable. But for most medical students, the advanced features of the Pro model are overkill. Features like 120Hz refresh rates and LiDAR scanners might sound impressive, but they won’t significantly impact your core tasks of note-taking, studying, or using medical apps.
5. Overlooking Student Discounts and Trade-In Options
Many students miss out on potential savings by not utilizing available discounts. Apple offers exclusive student discounts through its Education Store, and you can often trade in your old devices for credit towards a new purchase. Keep an eye out for special promotions during back-to-school season or festive sales for additional savings.
Choosing the Right iPad for Your Needs: A Detailed Breakdown
Now that we’ve covered the common mistakes, let’s explore the popular iPad models and see how they stack up for medical students:
Advanced users, such as graphic designers or those who need the absolute best performance
Heavy multitasking, digital art, and AR-based medical apps
4.The iPad Mini – A Pocket-Sized Powerhouse for Medical Students
If you’re looking for a portable device without compromising on performance, the iPad Mini could be the ideal choice. Here’s why:
Compact and Lightweight: With an 8.3-inch display, the iPad Mini is easy to carry around—perfect for medical students constantly on the move, whether it’s between classes, clinical rotations, or study sessions.
Powerful Performance: Powered by the A15 Bionic chip, it can handle multitasking, running medical apps, and reviewing eBooks smoothly.
Apple Pencil (Gen 2) Compatibility: Ideal for annotating lecture notes, sketching anatomy diagrams, and highlighting PDFs.
Perfect for Quick Notes: Its size makes it great for on-the-go note-taking and reviewing study material without feeling bulky.
The iPad Mini is a great option for those who need something portable, efficient, and capable of handling the demands of medical school.
Maximizing Your iPad Investment: Accessories and Tips
Choosing the right iPad is just the first step. To truly unlock its potential as a medical school companion, consider these essential accessories and productivity tips:
Must-Have Accessories:
Apple Pencil (Gen 1 or Gen 2): This is an absolute essential for medical students. Annotate PDFs, sketch anatomical diagrams, and take handwritten notes with ease. The second-generation Apple Pencil offers a more seamless experience with wireless charging and double-tap functionality but comes at a higher price.
Keyboard Case: Typing out lecture notes or case reports is a breeze with a dedicated keyboard. Options like the Logitech Combo Touch, Apple’s Smart Keyboard Folio, or even more affordable third-party cases can significantly boost your productivity.
Screen Protector: Protect your investment from scratches and smudges. Matte screen protectors like Paperlike provide a paper-like texture, enhancing the Apple Pencil experience. Standard tempered glass protectors from brands like Spigen offer reliable protection.
Productivity Tips:
Must-Have Apps:
Notability/GoodNotes (iOS) or Samsung Notes: Transform your note-taking experience with these powerful apps.
Anki: Master spaced repetition and ace your exams with this flashcard-based learning app.
Complete Anatomy: Dive into the world of interactive 3D anatomy models.
UptoDate/Medscape: Stay up-to-date with the latest medical guidelines and research.
Organize Your Notes: A well-organized digital workspace is key to efficient studying. Use folders, tags, and color-coding systems within note-taking apps to keep your lecture notes, case studies, and personal notes easily accessible.
Sync Across Devices: Seamlessly access your notes and files from your iPhone or MacBook. iCloud sync for iPad users and cloud storage services like Google Drive or Microsoft OneDrive for Android users ensure you can study from anywhere.
Take Advantage of Split-Screen Multitasking: Boost your productivity by using split-screen mode to view lecture slides while taking notes or reference medical guidelines while working on case reports.
Exploring Alternatives: Are Android Tablets a Viable Option?
While iPads are undoubtedly popular, it’s worth considering alternatives, especially if you’re on a tighter budget or prefer the Android ecosystem. Brands like Samsung, Xiaomi, OnePlus, and Lenovo offer competitive tablets with features that might cater better to your needs.
1. Samsung Galaxy Tab Series: A strong contender to the iPad, offering a comparable experience with its included S Pen, which is as capable as the Apple Pencil for note-taking and sketching. Samsung’s DeX mode transforms your tablet into a desktop-like interface, enhancing productivity.
2. Xiaomi Pad 5:An attractive option for budget-conscious students, offering a high-resolution display and stylus support (Xiaomi Smart Pen sold separately) at an affordable price.
3. OnePlus Pad:The latest entry from OnePlus boasts an ultra-smooth 144Hz display and fast charging, making it a tempting choice for those who prioritize a premium experience at a mid-range price.
4. Lenovo Tab Series: Known for their affordability and robust build, Lenovo tablets offer a good value proposition, especially for students focused on media consumption and multitasking.
A Cool Personal Touch: Free Name Engraving on iPads
Here’s a little bonus tip: When you buy an iPad directly from Apple’s online store, you can get it engraved for free! Add your name, initials, a motivational quote, or even your future specialty to personalize your device. This not only adds a cool touch but also helps prevent mix-ups and deters theft.
Conclusion: Making an Informed Decision
Choosing an iPad for medical school is an investment that requires careful consideration. By understanding the common mistakes, evaluating your needs, exploring alternatives, and making use of available resources like student discounts and trade-in programs, you can make a wise decision that supports your journey through medical school. Remember, the right device is one that seamlessly integrates into your workflow, enhances your learning, and becomes a trusted companion on your path to becoming a doctor.
But here’s the catch: buying an iPad isn’t as simple as just picking the cheapest one on Amazon or the fanciest one with the best specs. As a medical student in India, where budgets are tight and the workload is immense, you want to make a smart, informed choice. Trust me, making the wrong decision can leave you frustrated—or worse, out of pocket.
So, let me guide you through this. In this blog, I’ll break down the common mistakes that medical students like you make when buying an iPad and how you can avoid them. Let’s start with the first, and probably the most tempting, mistake.
Mistake 1: Buying the Cheapest iPad Without Checking Compatibility
Why This Happens
I get it. You’re a student, and budget is king. You want to save money wherever possible, and the cheapest iPad seems like the logical option. After all, an iPad is an iPad, right? Well, not really. Many students jump on the most affordable option without realizing that not all iPads are created equal—especially when it comes to compatibility with tools like the Apple Pencil or external keyboards.
Why This Is a Problem
Think about it: as a medical student, you’ll be spending countless hours taking notes, sketching anatomical structures, or marking up PDF textbooks. If your iPad doesn’t support the Apple Pencil (or supports only the older version), you’re going to have a tough time. The same goes for keyboards—typing out case reports or assignments without a proper keyboard can be a nightmare.
For example, the iPad 9th Gen (the entry-level model) only supports the Apple Pencil Gen 1. While it’s okay for basic tasks, it lacks some advanced features like wireless charging and a more ergonomic design, which the Apple Pencil Gen 2 offers. On the flip side, models like the iPad Air or iPad Pro support the Apple Pencil Gen 2, which is far superior for medical students who need precision and efficiency.
How to Avoid This Mistake
Here’s how you can make the right call:
Research Your Needs Before making a decision, think about how you plan to use your iPad. Do you need it for sketching anatomy diagrams? Annotating textbooks? Or typing out long case reports? Knowing this will help you decide which features are essential for you.
Check Compatibility Here’s a quick breakdown of popular iPad models and their compatibility:
iPad 10th Gen (Budget-Friendly): Supports Apple Pencil Gen 1 and basic keyboard cases. Good for light use but may feel limiting as you progress in your studies.
iPad Air (Mid-Range): Supports Apple Pencil Gen 2 and Magic Keyboard. A solid option for most medical students.
iPad Pro (High-End): Designed for power users. Great for those who want advanced features like the M2 chip and 120Hz display, but it’s probably overkill for the average medical student.
Look for Alternatives If you’re on a tight budget, consider older refurbished models of the iPad Air or iPad Pro. These often offer better compatibility and performance than the base model at a similar price point.
Mistake 2: Overestimating or Underestimating Storage Needs
Why This Happens
Let’s be real—storage is one of those things we rarely think about until we run out of it. Some students go all out and buy the highest storage option, thinking, “I’ll never have to worry about running out of space.” Others underestimate how much space they’ll actually need and go for the base model with 64GB, thinking it’s enough. Spoiler alert: it’s not.
Why This Is a Problem
As a medical student, you’ll be downloading tons of eBooks, medical apps, and video lectures. Apps like Complete Anatomy, Notability, or even Anki can eat up a lot of space. Then there are high-quality anatomical images, patient notes (if you’re in clinical years), and even case presentation files.
Here’s what usually happens: if you go for low storage (like 64GB), you’ll constantly be offloading apps and files, which can disrupt your workflow. On the flip side, paying for 1TB of storage when you only need 256GB is just throwing money away.
How to Avoid This Mistake
Assess Your Needs Think about what you’ll be storing on your iPad. For most medical students, 128GB or 256GB is the sweet spot. If you’re someone who likes to keep everything offline—videos, textbooks, and notes—consider going for 256GB or higher.
Use Cloud Storage Don’t forget about iCloud! For just ₹75 a month, you can get 50GB of iCloud storage, and for ₹219 a month, you get 200GB. This is a cost-effective way to avoid overspending on a high-storage iPad.
Plan for Growth If you’re in your first or second year, you may not need a lot of storage now. But as you progress, your resource library will grow. It’s better to spend a little more upfront than regret it later.
Next Up: Stay Protected and Smart
Now that you know how to avoid the first two mistakes, let’s move on to another often-overlooked aspect: protection. A good protective case is not just an accessory; it’s a necessity for medical students juggling lectures, labs, and clinical postings. Stay tuned!
By following these tips, you’ll avoid the frustration of buying the wrong iPad and ensure it fits your academic and clinical needs perfectly. Let’s make your medical journey smoother, one smart purchase at a time!
We’ve all been there—spending big bucks on a device and thinking, “I’ll just grab a cheap case from the local store later.” For medical students, this is often due to prioritizing the device itself and viewing accessories as non-essential extras. Unfortunately, this mindset can lead to costly consequences.
Why It’s a Problem
As a medical student, you’ll be constantly moving between lecture halls, labs, and clinical rotations. Your iPad will become your go-to tool for everything—taking notes, referring to medical resources, or even pulling up case histories. With all this traveling, the risk of accidental drops or scratches skyrockets. A damaged screen or a dented frame isn’t just inconvenient—it’s expensive to repair and disruptive to your studies.
Let me paint you a picture: a friend of mine once skipped getting a quality case for his iPad, thinking it wasn’t a priority. Fast forward to a week later, the iPad slipped out of his bag during a busy clinical day. The result? A shattered screen and a hefty ₹15,000 repair bill. Don’t let this be you.
How to Avoid It
Invest in a Durable Case Look for cases that offer full-body protection, including the edges and the screen. Brands like OtterBox, Spigen, and UAG specialize in shockproof cases that can withstand daily wear and tear. If you’re on a budget, options like Ringke also provide good protection at a lower price point.
Consider Additional Features Many cases now come with integrated Apple Pencil holders, which is super handy for keeping everything in one place. Some even double as keyboards, like the Logitech Combo Touch or Apple’s own Smart Keyboard Folio, offering added productivity benefits.
Don’t Skimp on Screen Protectors While cases protect the body, a tempered glass screen protector safeguards your display from scratches and smudges. If you’re a fan of handwritten notes or drawing, consider a matte screen protector (like Paperlike) for a smoother, paper-like feel.
Mistake 4: Spending Too Much on High-End Models Without Needing Pro Features
Why It Happens
Marketing is powerful. When brands like Apple highlight features like M2 chips, ProMotion displays, and LiDAR scanners, it’s easy to believe you need the most expensive iPad. Combine that with peer pressure (everyone seems to have an iPad Pro these days), and many students end up overspending.
Why It’s a Problem
Here’s the thing: most medical students don’t need the advanced features of the iPad Pro. While features like 120Hz refresh rates and ultra-wide cameras sound impressive, they won’t significantly impact your day-to-day tasks like taking notes, annotating PDFs, or accessing medical apps. Essentially, you’re paying for features you might never use.
For example, the iPad Air offers nearly the same performance as the iPad Pro for a significantly lower price. The key differences—like the lack of Face ID or a slightly smaller display—are negligible for most students. Spending extra on the Pro when an Air would suffice is simply wasting money.
How to Avoid It
Match Features to Your Needs Think about what you’ll actually use your iPad for. If it’s primarily for studying, note-taking, and light multitasking, the iPad Air or even the iPad 9th Gen will handle it with ease. If you’re into graphic design or advanced AR apps, then consider the Pro.
Don’t Be Swayed by Peer Pressure Just because your classmates are flaunting the latest Pro model doesn’t mean you have to follow suit. Remember, it’s about finding a device that meets your academic and clinical needs, not theirs.
Check for Refurbished Deals Apple’s Certified Refurbished Store often has Pro models at discounted prices. This is a great way to get premium features without breaking the bank. Just make sure the device comes with a warranty.
Mistake 5: Overlooking Student Discounts and Trade-In Options
Why It Happens
Many students simply don’t know that Apple offers exclusive discounts for students or that old devices can be traded in for credit towards a new purchase. Others assume these programs are complicated or not worth the effort.
Why It’s a Problem
Missing out on discounts means you’re leaving money on the table. For instance, Apple’s Education Store in India offers up to ₹10,000 off on iPads for students. Combine that with trade-in options or bundled offers (like free AirPods during back-to-school sales), and you could save a significant amount.
How to Avoid It
Leverage the Education Store Visit Apple’s Education Store online or through an authorized retailer to access discounts. All you need is a valid student ID or proof of enrollment.
Trade In Your Old Device If you already own an older iPad, laptop, or smartphone, check Apple’s Trade-In Program. You’ll receive credit towards your new device, reducing the overall cost.
Keep an Eye on Offers Retailers like Amazon, Flipkart, and Croma often have deals during festivals like Diwali or during events like Amazon Great Indian Festival. EMI options and cashback offers through certain banks can also make the purchase more affordable.
Now that we’ve tackled the common mistakes, let’s get into the nitty-gritty of choosing the perfect iPad. Here’s a breakdown of popular models and how they stack up for medical students:
Model
Key Features
Best For
Price (₹)
iPad 9th Gen
Apple Pencil Gen 1 support, A13 chip, basic keyboard
Budget-friendly students
~30,000
iPad Air (5th Gen)
Apple Pencil Gen 2 support, M1 chip, lightweight
Most medical students (great balance)
~55,000
iPad Pro (11-inch)
Apple Pencil Gen 2 support, M2 chip, ProMotion display
Advanced users (e.g., graphic designers)
~82,000
Practical Buying Tips
Buy During Sales: Keep an eye out for discounts during Amazon or Flipkart sales.
Go Refurbished: Apple’s Certified Refurbished devices offer quality and warranties at lower prices.
Use EMI Options: Many retailers offer no-cost EMI plans, making it easier to spread the cost over several months.
Apple Pencil (Gen 1 or Gen 2): Perfect for annotating PDFs, sketching anatomy diagrams, and handwriting notes. The Gen 2 is more ergonomic, but the Gen 1 still gets the job done for a lower price.
Keyboard Case: A must-have for typing notes or case reports. Options like the Logitech Combo Touch or Apple’s Smart Keyboard Folio are durable and functional.
Screen Protectors: Matte screen protectors like Paperlike make writing with the Apple Pencil feel more natural. If you prefer regular glass protectors, brands like Spigen are reliable.
Conclusion
To sum it up, buying an iPad as a medical student is a big investment, but it doesn’t have to be overwhelming. Avoiding common mistakes like going for the cheapest model, neglecting protective accessories, or overspending on unnecessary features will save you time, money, and frustration.
Focus on your academic and clinical needs, compare models carefully, and make use of student discounts and trade-in programs to get the best value for your money. With the right iPad, you’ll have a versatile tool that not only supports your studies but also makes learning more engaging and efficient.
Now, go forth and make an informed choice—you’ve got this! If you’ve got any questions or want more personalized advice, feel free to drop a comment below.
How to Choose the Right iPad for Medical Students
As a final-year MBBS student from Kerala, I’ve seen firsthand how having the right tech tools can transform our academic and clinical experience. The iPad has become a favorite among medical students for its versatility, portability, and powerful features. However, picking the right model can be tricky, especially if you’re on a budget or unaware of the nuances between different versions. Here’s a detailed guide to help you decide, including alternative options like Samsung, Xiaomi, OnePlus, and Lenovo tablets that might fit your needs just as well.
Popular iPad Models: A Comparison for Medical Students
Feature
iPad 9th Gen
iPad Air (5th Gen)
iPad Pro (11” 4th Gen)
Price (Approx)
₹28,000–₹35,000
₹55,000–₹65,000
₹75,000–₹1,00,000+
Apple Pencil Support
Gen 1
Gen 2
Gen 2
Keyboard Compatibility
Supports external keyboards
Magic Keyboard/Folio
Magic Keyboard/Folio
Storage Options
64GB, 256GB
64GB, 256GB
128GB, 256GB, 512GB, 1TB, 2TB
Display
Retina, 10.2”
Liquid Retina, 10.9”
Liquid Retina, 11” (120Hz ProMotion)
Performance
A13 Bionic
M1 chip
M2 chip
Best For
Budget-friendly note-taking, basic apps
Note-taking, studying, casual multitasking
Heavy multitasking, digital art, and AR-based tools
Which iPad is right for you? If you’re primarily using your tablet for annotating PDFs, taking notes, and accessing medical resources like UptoDate or Anki, the iPad 9th Gen is a solid budget-friendly choice. For those who want slightly better performance and future-proofing, the iPad Air offers a balance of price and power. If you’re into advanced tasks, like using AR apps for anatomy or creating high-quality presentations, consider the iPad Pro—but be sure you really need those premium features.
Practical Buying Tips for iPads
Take Advantage of Student Discounts: Apple offers student discounts through its Education Store. You may also get offers like free AirPods during certain promotional periods.
Shop During Sale Seasons: Keep an eye on sale events like Amazon’s Great Indian Festival, Flipkart’s Big Billion Days, and Apple’s seasonal promotions. These events often include bundled discounts with accessories.
Consider Refurbished Models: Apple-certified refurbished products can save you a lot of money and come with the same warranty as new ones.
Accessories to Consider for Medical Students
1. Apple Pencil: This is a game-changer for medical students. With the Apple Pencil, you can annotate PDF textbooks, sketch anatomy diagrams, and take handwritten notes during lectures. The second-generation Apple Pencil is sleeker, charges wirelessly, and offers advanced features like double-tap to switch tools. However, it’s compatible only with newer models like the iPad Air and iPad Pro.
2. Keyboard Case: Typing lecture notes or drafting reports during clinical rotations becomes much easier with a keyboard case. Look for cases like the Apple Magic Keyboard or third-party options like Logitech Slim Folio, which are often more affordable.
3. Screen Protector: A matte screen protector like Paperlike not only protects your screen but also provides a paper-like texture, which makes writing with the Apple Pencil feel natural.
Considering Alternatives to iPads: Samsung, Xiaomi, OnePlus, and Lenovo Tablets
While iPads are excellent, they aren’t the only option. Many Android tablets offer comparable features at a more affordable price. Here are some alternatives to consider:
Samsung has been a leader in Android tablets for years, offering devices that rival even the high-end iPad models.
Feature
Samsung Galaxy Tab S6 Lite
Samsung Galaxy Tab S8
Price (Approx)
₹27,000–₹30,000
₹58,000–₹70,000
Stylus Support
S Pen included
S Pen included
Display
TFT, 10.4”
LCD, 11” (120Hz)
Storage Options
64GB, 128GB
128GB, 256GB
Best For
Budget-friendly note-taking
Performance, multitasking
The S Pen, included with Galaxy tablets, is as effective as the Apple Pencil for tasks like annotating notes or sketching. Samsung tablets also support multitasking features like split-screen, which can enhance your productivity during study sessions.
Xiaomi has entered the tablet market with affordable yet powerful devices.
Feature
Xiaomi Pad 5
Price (Approx)
₹26,000–₹30,000
Stylus Support
Xiaomi Smart Pen (sold separately)
Display
11” WQHD+ 120Hz
Storage Options
128GB, 256GB
Best For
Affordable productivity and media consumption
The Xiaomi Pad 5 is perfect for budget-conscious students who still want a high-resolution display and stylus support. While its ecosystem isn’t as seamless as Apple’s, it’s a strong contender for students focused on affordability.
OnePlus, known for its smartphones, recently launched the OnePlus Pad.
Feature
OnePlus Pad
Price (Approx)
₹37,000–₹40,000
Stylus Support
OnePlus Stylo (sold separately)
Display
11.61” 144Hz
Storage Options
128GB, 256GB
Best For
Fast performance and premium design
The OnePlus Pad stands out for its ultra-smooth 144Hz display and fast charging. It’s a great choice for students who want premium features at a mid-range price.
Lenovo tablets are known for their affordability and robust build quality.
Feature
Lenovo Tab P11 Pro (2nd Gen)
Price (Approx)
₹35,000–₹40,000
Stylus Support
Lenovo Precision Pen 3
Display
11.2” OLED 120Hz
Storage Options
128GB
Best For
Media consumption, multitasking
The Lenovo Tab P11 Pro offers an excellent OLED display, making it a great option for viewing high-quality anatomical diagrams or video lectures. Its stylus is responsive, though not as advanced as the Apple Pencil or S Pen.
Tips for Maximizing Productivity with Any Tablet
Regardless of which tablet you choose, it’s essential to use it effectively for your studies. Here are some tips:
1. Must-Have Apps for Medical Students:
Notability/GoodNotes (iOS) or Samsung Notes: For digital note-taking and PDF annotation.
Anki: Ideal for spaced repetition and flashcard-based learning.
Complete Anatomy: A 3D anatomy app that works on both iOS and Android.
UptoDate/Medscape: Quick access to medical guidelines and case discussions.
2. Organize Your Notes: Keep your lecture notes, case studies, and personal notes well-organized in folders. Apps like Notability (iOS) or Google Keep (Android) are great for this purpose.
3. Sync Across Devices: If you’re using an iPad, iCloud ensures your data is accessible across all Apple devices. For Android users, Google Drive or Microsoft OneDrive works just as well.
Conclusion
Choosing the right tablet as a medical student isn’t just about picking the most expensive or popular model—it’s about understanding your academic and clinical needs, balancing features with your budget, and exploring alternatives that might offer better value. While iPads are an excellent choice for their seamless ecosystem and powerful features, brands like Samsung, Xiaomi, OnePlus, and Lenovo offer competitive options at different price points.
Whether you choose an iPad or an Android tablet, remember to invest in the right accessories and apps to maximize your productivity. And don’t forget to keep an eye out for student discounts, trade-in programs, and seasonal sales to get the best deal.
If you’re unsure about which tablet to choose, take a moment to reflect on your study habits and clinical requirements. The right device will not only support your learning but also make your medical journey smoother and more enjoyable.
A Cool Personal Touch: Free Name Engraving on Apple Devices
Did you know that when you buy an iPad directly from the Apple Online Store, you can get your name, initials, or a personal message engraved on your device—completely free of cost? As a medical student, this is such a thoughtful feature that not only adds a personal touch to your iPad but also makes it instantly recognizable among a sea of identical devices in your batch or library.
How to Get Your iPad Engraved for Free
When purchasing your iPad from the official Apple Online Store, you’ll see an option to add engraving during the checkout process. Here’s how it works:
Select Your iPad Model: Choose the iPad that fits your requirements—be it the iPad 9th Gen, iPad Air, or the iPad Pro.
Customize Your Device: Once you’ve picked the model, Apple will prompt you to add engraving. Here, you can type in your name, initials, or even emojis to make your device unique.
Preview Your Engraving: Apple provides a live preview of how your chosen engraving will look on the device. This ensures you’re happy with the design before finalizing.
Proceed to Checkout: Complete the purchase, and your personalized iPad will be shipped to your doorstep without any extra charges for the engraving.
Why Engraving is Great for Medical Students
As a medical student, this feature is more than just aesthetic. Here’s why it’s worth considering:
Identity: Engraving your name ensures your iPad stands out, which is especially useful when everyone in your batch seems to own the same device.
Security: Personalization can act as a deterrent against theft or accidental mix-ups in labs or libraries.
Sentimentality: An engraved device feels more personal and meaningful, making it a cherished part of your medical journey.
Engraving Ideas for Medical Students
If you’re unsure what to engrave, here are some suggestions tailored to med students:
Your full name or initials (e.g., Dr. Akash U. V.)
Motivational quotes like “First, do no harm” or “To cure sometimes, to comfort always”.
Your field of interest, such as “Future Cardiologist” or “Healing Hands in the Making”.
Fun emojis like a stethoscope 🩺, syringe 💉, or even an apple 🍎 for a subtle nod to Apple.
Important Notes About Engraving
Resale Value: Keep in mind that engraving might reduce the resale value of your device, as it becomes personalized.
Shipping Times: Adding an engraving could slightly delay your delivery since Apple needs extra time for customization.
Direct Links to Buy and Customize
Here are direct links to the Apple Online Store for each iPad model:
Click on the links above, and you’ll be guided through the process of customizing your iPad, including the option to add free engraving.
Alternatives: Can Android Tablets Be Personalized Too?
While brands like Samsung, Xiaomi, and Lenovo don’t typically offer free engraving, you can explore third-party personalization services to achieve a similar effect. Many e-commerce platforms provide laser engraving options for an additional fee. However, this often involves extra costs and doesn’t carry the same sleek integration as Apple’s free engraving service.
Conclusion
Apple’s free engraving feature is a small but impactful way to make your iPad unique and memorable. As a final-year MBBS student, I can say that having my name engraved on my iPad would make it feel like more than just a device—it’s a trusted companion in my medical journey.
If you’re considering purchasing an iPad for medical school, make sure to take advantage of this feature. And remember, always research thoroughly to find the right device for your needs—whether it’s an iPad or an Android alternative—and make it your own!
Head over to the Apple Online Store now to explore your options and personalize your device at no extra cost.
We Analyzed the iPad Lineup in 2025 and Discovered the Best Picks for Students
Choosing the right tech tools can make or break a student’s academic experience. Among the most versatile devices for students in 2025, Apple’s iPad lineup stands out for its combination of portability, performance, and a robust ecosystem. However, with multiple iPads available—each catering to different needs—it can be daunting to decide which one is best suited for your academic journey. Whether you’re a high school student tackling daily assignments or a college student managing a demanding course load, this blog unpacks the current iPad lineup, compares their features, and identifies the best picks based on performance, pricing, and student-specific use cases.
The iPad Lineup in 2025: A Quick Overview
Apple’s 2025 iPad lineup includes the following models:
iPad (10th Generation)
iPad Mini (7th Generation)
iPad Air (6th Generation)
iPad Pro (6th Generation, M2 Chip)
Each of these devices offers distinct features, specifications, and price points. Let’s break down each one to help you determine which fits your needs as a student.
1. iPad (10th Generation): The Affordable All-Rounder
The standard iPad remains one of the most accessible and budget-friendly options for students. Priced at around \$449, it combines essential features with an easy-to-use interface that’s perfect for younger students or those on a tight budget.
Key Features:
Display: 10.9-inch Liquid Retina display
Processor: A14 Bionic chip
Storage Options: 64GB and 256GB
Apple Pencil Support: Compatible with Apple Pencil (1st Gen)
Connectivity: Wi-Fi 6 and optional 5G
Why It’s Great for High School Students
For high school students, the iPad (10th Generation) is more than sufficient for basic tasks like taking notes, completing assignments, and browsing the web. The A14 Bionic chip ensures smooth multitasking, and its compatibility with the first-generation Apple Pencil makes it a reliable tool for note-taking and sketching.
Potential Downsides:
Limited storage in the base model (64GB may not be enough for extensive use).
Lacks support for the Apple Pencil (2nd Gen), which offers advanced features like double-tap gestures.
Best Use Case:
The iPad (10th Gen) is ideal for high school students who need a functional and affordable device for general academic use without advanced professional features.
2. iPad Mini (7th Generation): Compact and Portable
The iPad Mini, starting at \$549, is the most portable option in the lineup. Its smaller size and lightweight design make it perfect for students constantly on the go.
Key Features:
Display: 8.3-inch Liquid Retina display
Processor: A15 Bionic chip
Storage Options: 64GB and 256GB
Apple Pencil Support: Compatible with Apple Pencil (2nd Gen)
Connectivity: Wi-Fi 6 and optional 5G
Why It’s Great for Note-Taking
The iPad Mini’s compact size makes it a fantastic digital notebook. It fits easily in backpacks and is perfect for jotting down quick notes during lectures. With Apple Pencil (2nd Gen) compatibility, students can enjoy features like precise handwriting and easy annotation.
Potential Downsides:
The smaller screen size may not be ideal for tasks requiring extensive multitasking or media consumption.
Pricier than the standard iPad, despite offering less screen real estate.
Best Use Case:
Great for students who prioritize portability and need a compact device for note-taking, reading, and light productivity tasks.
For students seeking a mid-range device with excellent performance, the iPad Air hits the sweet spot. Priced at \$699, it offers many of the features found in the iPad Pro but at a more affordable price point.
Apple Pencil Support: Compatible with Apple Pencil (2nd Gen)
Connectivity: Wi-Fi 6 and optional 5G
Why It’s Ideal for College Students
The iPad Air is powered by Apple’s M1 chip, making it powerful enough for multitasking, running demanding apps, and even light video editing. For college students managing complex projects or assignments, the iPad Air offers the perfect mix of performance, portability, and affordability.
Potential Downsides:
Base storage (64GB) may be limiting for students who use storage-intensive apps or download large files.
Best Use Case:
The iPad Air is perfect for college students who need a balance of performance and affordability. It’s especially great for students studying subjects like graphic design, architecture, or engineering, as it supports resource-intensive apps like AutoCAD and Adobe Illustrator.
The iPad Pro is the most advanced option in the lineup, starting at \$1,099. With cutting-edge features and unparalleled performance, it’s designed for students who need a device that can double as a laptop replacement.
Key Features:
Display: 11-inch or 12.9-inch Liquid Retina XDR display
Processor: M2 Chip
Storage Options: 128GB, 256GB, 512GB, 1TB, and 2TB
Apple Pencil Support: Compatible with Apple Pencil (2nd Gen)
Connectivity: Wi-Fi 6E and optional 5G
Why It’s Perfect for Professional Students
The iPad Pro’s M2 chip delivers performance on par with Apple’s MacBooks, making it capable of handling the most demanding applications. The larger screen size and ProMotion technology make it an excellent choice for students in fields like medicine, engineering, or filmmaking, where precision and speed are crucial.
Potential Downsides:
The high price point may not justify the features for students with basic needs.
Heavier and less portable than other iPads.
Best Use Case:
The iPad Pro is ideal for students who require professional-grade tools for advanced tasks, such as video editing, 3D modeling, or medical imaging. It’s a future-proof device for students who need top-tier performance.
Comparing the Lineup: What’s Best for High School vs. College Students?
High School Students
Best Option: iPad (10th Gen)
Reason: Affordable pricing, sufficient performance for basic academic tasks, and compatibility with essential accessories like the Apple Pencil (1st Gen).
Key Consideration: High school students likely won’t need the advanced features of the iPad Air or Pro, making the standard iPad the best value.
College Students
Best Option: iPad Air (6th Gen) or iPad Pro (6th Gen, M2 Chip)
Reason: College students often require more robust performance for multitasking, professional apps, and creative projects. The iPad Air strikes a balance between price and power, while the iPad Pro is ideal for those in technical or creative fields.
Key Consideration: Storage capacity is crucial for college students. Opt for at least 256GB to ensure ample space for apps, files, and media.
Accessories to Maximize Your iPad Experience
Regardless of which iPad you choose, the right accessories can significantly enhance your productivity. Here are some must-haves:
Apple Pencil (1st or 2nd Gen): Perfect for note-taking, drawing, and annotating documents.
Magic Keyboard or Smart Keyboard Folio: Transform your iPad into a laptop for seamless typing.
Apple AirPods: Ideal for students who need to stay focused in noisy environments or want to participate in virtual lectures.
iPad for Specialized Subjects: Which iPad Is Best for Your Major?
Creative Students (Art, Design, Photography)
Best iPad: iPad Air (6th Gen) or iPad Pro (6th Gen)
Reason: For students studying art, graphic design, photography, or animation, an iPad with a powerful processor and compatibility with the Apple Pencil is essential. The iPad Pro is the top choice for professionals and offers the best screen resolution and speed.
Engineering and Architecture Students
Best iPad: iPad Air (6th Gen) or iPad Pro (6th Gen)
Reason: These fields require a robust device for CAD software, modeling, and other advanced applications. The iPad Air or iPad Pro will provide the power needed for heavy multitasking and complex apps.
Conclusion: The Best iPad for Students in 2025
Whether you’re in high school or college, there’s an iPad that suits your needs and budget. For students seeking the most affordable option, the iPad (10th Gen) offers great value. However, if you require more power for demanding tasks, the iPad Air or iPad Pro will provide the performance and versatility you need.
Ultimately, the right choice depends on your field of study, academic needs, and budget. Don’t forget to check Apple’s student discounts and deals for extra savings on your purchase!
For more advice on choosing the best tech for students, check out our other blogs on essential study tools and productivity apps. Stay ahead with the best gadgets and make your academic journey easier and more efficient.
The Missing Piece in iPad Buying Decisions: Understanding What You Actually Need
When considering an iPad for school, many students focus mainly on the price or brand rather than specific features that would truly make a difference in their day-to-day academic life. It’s easy to overlook critical factors like compatibility with accessories, battery life, and the importance of having the right screen size for various tasks. But selecting the wrong iPad can result in frustration and missed opportunities, especially when you’re relying on it for note-taking, research, or even creative tasks like graphic design.
The missing piece is understanding how to tailor your iPad choice to your personal academic needs and how you plan to use the device throughout your studies. The power of iPads isn’t just in their performance; it’s also in how well they integrate into your academic routine. Once you understand the nuances of each model, the decision-making process becomes much easier.
Top 5 Things You Need to Know About iPads for School in 2025
Before you buy, there are some key points to consider when evaluating which iPad is best for school:
1. iPads Are Not Just for Reading – They’re for Multitasking
Multitasking is one of the most important features to consider when choosing an iPad. iPads that come with more powerful processors (like the M1 or M2 chip) can handle multiple apps running simultaneously, such as using Microsoft Word for essays while taking notes in Notability or drawing diagrams in Adobe Illustrator. This makes the iPad Pro and iPad Air better for students in advanced fields like medicine or design, where you often need to run high-demand applications alongside simpler apps like browsers or email.
2. Battery Life Matters More Than You Think
The iPad’s battery life may seem similar across models, but performance can vary depending on how intensively you use the device. For instance, the standard iPad and iPad Air are rated for up to 10 hours of use, but power users—those editing videos or running complex apps—will see a drop in battery performance. College students in demanding courses will appreciate models like the iPad Air or Pro with higher chip performance and better energy management.
3. Don’t Underestimate the Power of the Apple Pencil
If you’re a student who plans to do a lot of note-taking, highlighting, or sketching, the Apple Pencil is a must-have accessory. The iPad Air and iPad Pro are compatible with the 2nd-generation Apple Pencil, which offers features like double-tap for switching between tools and wireless charging. It’s a game-changer for annotating documents or creating digital notes in apps like GoodNotes or OneNote.
4. Storage is Key
As a student, you may need to store large files such as textbooks, lecture recordings, and multimedia content. The base model iPad (10th Gen) offers 64GB of storage, but this may fill up quickly, especially if you plan to use your iPad for media-heavy projects or storing your entire collection of textbooks. For more space, consider the iPad Air with 256GB storage or the iPad Pro if you’re looking for future-proofing with up to 2TB of storage.
5. iPads Are Not Just for Learning – They’re for Creating
While iPads are often associated with consumption—whether that’s reading articles, watching videos, or browsing the web—they’re also excellent tools for creating. If you’re into graphic design, music production, or video editing, the iPad Pro with its advanced M2 chip and support for pro-level apps (like Final Cut Pro, Procreate, and Logic Pro) is an invaluable asset.
The Secret That Professionals Won’t Tell You: iPads Are More Than Just a Secondary Device
Many students initially think of iPads as a secondary device, meant to complement their laptops. However, with the advancements made in 2025, especially with the M2 chip in the iPad Pro, iPads are capable of fully replacing laptops for many students. The secret is that iPads can do much more than basic note-taking or casual browsing. With the right accessories, such as the Magic Keyboard, the iPad Pro becomes a powerful tool for writing, managing spreadsheets, and even doing research.
The iPad Pro is equipped with a Liquid Retina XDR display, ideal for students in creative disciplines like graphic design, photography, and video editing. Its performance can match that of a MacBook, allowing students to run multiple apps at once, create digital art, and produce high-definition videos—all without the limitations that some laptops might impose.
Common Mistakes People Make When Choosing an iPad for School
When selecting an iPad, it’s easy to make a few mistakes that could affect your academic experience. Here are some of the most common pitfalls:
1. Not Considering Storage Needs
Many students opt for the lower storage options (64GB or 128GB) to save money, but that can lead to trouble when apps, media files, and documents begin to pile up. If you’re planning on downloading textbooks, videos, or creating large multimedia projects, consider opting for at least 256GB of storage to avoid running into space issues mid-semester.
2. Overlooking Accessory Compatibility
Not all iPads are compatible with the same accessories. If you’re specifically looking for Apple Pencil support, be sure to check which generation of the Apple Pencil your chosen iPad model supports. For instance, the iPad (10th Gen) only works with the first-gen Apple Pencil, while the iPad Air and iPad Pro support the second-gen, which has more advanced features.
3. Prioritizing Price Over Functionality
It’s tempting to buy the cheapest option, especially when you’re working with a limited student budget. However, if you’re going to use your iPad extensively for your studies, it’s worth investing in a model that meets your performance requirements. The iPad Air and iPad Pro are pricier, but they deliver the power needed to run apps that are essential for subjects like engineering, graphic design, and even medicine.
Why Experts Use This One Trick for Choosing the Right iPad: Matching it with Your Course Load
Experts always advise students to match their iPad choice to their specific course load. Students in high-demand fields, like medical school or architecture, will require more powerful devices with higher processing power, storage, and the ability to run specialized apps. For example, the iPad Pro’s M2 chip and large display make it an ideal choice for medical students who need to work with detailed 3D models or the iPad Air for engineering students who need to run complex CAD software.
If you’re a student pursuing a degree in the humanities or social sciences, an iPad (10th Gen) or iPad Mini might suffice, as you’ll mostly be using the device for research, note-taking, and reading.
Hidden Features in iPads You Need to Know About
Here are a few hidden features of the iPad that many students don’t realize can drastically improve their productivity:
1. Multitasking Capabilities
The iPad’s ability to run multiple apps side-by-side (Split View) and use Slide Over for quick access to other apps makes it a great multitasking device for students.
2. Sidecar Functionality
For students who already own a MacBook, the iPad’s Sidecar feature allows you to use your iPad as a second screen, which is perfect for multitasking during research, coding, or writing.
3. Notes App with Handwriting Recognition
The iPad Notes app, when paired with an Apple Pencil, can convert handwritten notes into text, allowing you to quickly search for specific terms or ideas.
Top Hacks for iPad Usage That Actually Work
Here are some top hacks to maximize your iPad experience:
Use the Apple Pencil to Annotate PDFs and E-books: Mark up digital textbooks, research papers, or lecture slides with the Apple Pencil for efficient studying.
Organize Your Digital Notes: Use apps like Notability or GoodNotes to keep your notes organized by subject and topic.
Leverage the Files App for Cloud Storage: Use iCloud or Google Drive to store documents and notes, making them accessible across all your Apple devices.
The Surprising Truth About iPads for School: You’ve Been Doing It Wrong
Many students assume that laptops are the best devices for schoolwork. But the truth is, iPads—especially with the latest features and accessories—are powerful enough to replace laptops for most students. Whether you’re a high school student trying to get organized or a college student needing a versatile device for research and projects, the iPad lineup in 2025 offers options that will elevate your academic experience.
Conclusion: Picking the Best iPad for Your Academic Needs
In 2025, choosing the right iPad depends largely on what you need it for. The iPad (10th Gen) offers great value for basic tasks, while the iPad Mini excels in portability. For students who need higher performance for multitasking and creative work, the iPad Air and iPad Pro deliver excellent performance. Understanding the specific needs of your academic discipline, and selecting an iPad that matches those needs, will ensure you make the best decision.
No matter which model you choose, investing in an iPad that complements your study habits will boost your productivity and enhance your overall learning experience.
An Augmented Reality Program Can Help Patients Overcome Parkinson’s Symptoms
The original article by Grace Browne offers an insightful perspective on the use of augmented reality (AR) to help Parkinson’s patients overcome their symptoms. Below is a summary and review of their observations:
As the author highlights, simple external cues, such as lines on the floor, can help Parkinson’s patients focus their efforts and overcome the difficulty of their symptoms. However, with augmented reality, those cues can be anywhere. This means that patients can benefit from these cues in a variety of settings, making it easier for them to stay active and improve their quality of life.
My Observations: While the author highlights the potential benefits of AR for Parkinson’s patients, it could be expanded by considering the potential challenges and limitations of this technology. For example, AR can be expensive and may not be accessible to all patients. Additionally, the long-term effects of AR on patients are not yet fully understood. It is important to consider these factors when evaluating the use of AR for Parkinson’s patients.
Garlic, a staple in almost every household, is a powerful natural remedy with incredible medicinal properties. It has been used by several cultures for centuries to alleviate cold and flu symptoms.
This is all thanks to a chemical compound called allicin, which is believed to have antibacterial, antiviral, and immune-boosting properties. So, let’s explore 5 simple hacks where garlic can be used to help relieve your cold and flu symptoms.
In many cultures, raw garlic is chopped or crushed and mixed with honey to treat symptoms of the cold and flu. Honey is known for its soothing properties, while garlic is believed to help fight off infections and boost immunity. People typically consume this mixture a few times a day to ease sore throats and reduce coughing.
This remedy combines the immune-boosting benefits of garlic with the soothing and antimicrobial properties of honey. It is commonly used to ease sore throats and coughs.
Steps:
Peel and finely chop or crush 1-2 garlic cloves.
Place the garlic in a small jar or container.
Add 1-2 tablespoons of raw, organic honey to the garlic.
Let the mixture sit for about 15-20 minutes to allow the garlic to infuse with the honey.
Consume 1 teaspoon of the mixture every few hours throughout the day.
Note: You can also let the garlic and honey sit overnight to create a more potent remedy.
Garlic tea is another popular remedy. The garlic cloves are boiled in water and the liquid is consumed warm, often with a dash of lemon or honey. The steam from the tea can also help clear nasal congestion, while garlic’s antiviral properties are believed to help reduce the duration and severity of symptoms.
Garlic tea is a popular remedy in many cultures for its ability to clear congestion and fight infections. The steam from the tea can help loosen mucus, while garlic works to reduce inflammation and support immune function.
Steps:
Crush 1-2 garlic cloves and place them in a small pot of water (about 1-2 cups).
Bring the water to a boil and let it simmer for about 10 minutes.
Remove from heat and strain the liquid into a mug.
Add lemon juice and honey to taste (optional).
Sip the tea while it’s warm to help ease symptoms.
Note: Garlic tea can be consumed 2-3 times a day when experiencing cold or flu symptoms.
In many households, garlic in combination with ginger to creates a potent herbal remedy for colds. Both ingredients are known for their anti-inflammatory and immune-boosting properties. This combination is often used in the form of a tea or tonic, which is consumed to relieve symptoms like congestion and sore throat.
Ginger and garlic both have anti-inflammatory properties, making them an excellent combination for easing cold and flu symptoms. Ginger helps soothe sore throats, while garlic boosts immunity.
Steps:
Crush or finely chop 1 garlic clove and 1-inch piece of fresh ginger root.
Boil 1-2 cups of water in a pot.
Add the garlic and ginger to the boiling water and let it simmer for 10-15 minutes.
Strain the liquid into a cup.
Add honey and lemon for added soothing effects and flavor.
Drink the tea once or twice a day, especially when symptoms are at their peak.
Note: Ginger is known to have a warming effect, which can help relieve congestion and improve circulation.
A common remedy in some cultures involves mixing garlic with lemon juice. Garlic is crushed and allowed to sit for a few minutes to activate allicin, then mixed with fresh lemon juice. The combination is believed to help break down mucus, relieve congestion, and support the immune system.
This remedy utilizes the antiviral properties of garlic along with the vitamin C boost from lemon. The mixture is believed to help break down mucus and relieve congestion.
Steps:
Crush 1-2 garlic cloves and allow them to sit for 5-10 minutes to activate the allicin (the active compound in garlic).
Add the crushed garlic to a glass of warm water (about 1 cup).
Squeeze the juice of half a fresh lemon into the water.
Stir well and drink the mixture.
Note: Drink this garlic and lemon concoction once a day, especially in the morning, to start your day with an immune-boosting boost.
In some communities, garlic-infused oil is used as a rub for the chest or back during the flu. The garlic oil is often applied in small amounts and massaged into the skin. The warming properties of the oil combined with garlic’s beneficial compounds are thought to help reduce chest congestion and ease breathing.
Garlic-infused oil can be used as a rub for chest congestion or to soothe sore muscles. The warming effect of the oil combined with garlic’s antimicrobial properties helps to open up airways and ease breathing.
Steps:
Peel and crush 4-5 garlic cloves.
Add the garlic to a small jar or glass bottle and pour in 1/2 cup of olive oil or coconut oil.
Seal the jar and let it sit for 24-48 hours in a warm place to infuse the garlic into the oil.
After the infusion period, strain the oil to remove the garlic pieces.
Massage a small amount of the infused oil onto your chest and back to ease congestion. You can also apply it to the soles of your feet.
Repeat this process 1-2 times a day, especially before bed, to help with nighttime congestion.
Note: Always test a small amount of the oil on your skin first to ensure there is no allergic reaction.
These remedies are widely used by communities around the world and have gained popularity due to garlic’s natural health benefits. However, it’s important to remember that while garlic can help alleviate symptoms, it is not a substitute for professional medical advice. Always consult with a healthcare provider if symptoms persist or worsen.
Organic Garlic Cloves and Bulb in wooden basket.
Additional Considerations:
Garlic as Food: Including garlic in your diet, such as in soups, stews, or salads, can also help support your immune system and fight off infections.
Dosage: The remedies mentioned above can be used in moderation. However, consuming too much raw garlic may cause digestive discomfort, so it’s important to pay attention to how your body reacts.
Consultation: While garlic is a natural remedy, if cold or flu symptoms persist or worsen, it’s essential to consult a healthcare provider for appropriate diagnosis and treatment.
These time-tested remedies are widely used in communities to support immune health and ease the symptoms of the common cold and flu.
Here’s a cleaner version of the citations you can copy and paste directly into your blog:
Citations of Studies on Garlic’s Medicinal Properties
Garlic and Immunity A 2012 study published in Clinical Nutrition found that aged garlic extract can enhance immune function and reduce the severity of colds and flu in individuals.
Reference: Ried K, et al. Aged garlic extract improves immune cell function and reduces severity of colds and flu: a randomized, double-blind, placebo-controlled nutrition intervention. Clin Nutr. 2012;31(4):534-540. Read the study here
Allicin’s Antimicrobial Properties Research from 2001 in Advances in Therapy demonstrated that garlic supplements high in allicin content significantly reduced the incidence of colds in participants.
Reference: Josling P. Preventing the common cold with a garlic supplement: a double-blind, placebo-controlled survey. Adv Ther. 2001;18(4):189-193. Read the study here
Turmeric, known as Curcuma longa, has long been celebrated for its powerful healing properties, especially in the context of skin care. In Kerala, the southern Indian state renowned for its rich tradition of Ayurveda, turmeric has been revered not only for its culinary and medicinal uses but also as a natural remedy for a wide array of skin ailments, including acne.
Known as the “golden root,” turmeric is an integral part of Aushadi Ayurveda, the traditional herbal medicine system of Kerala.
In Kerala, turmeric is called “മഞ്ഞൾ” (Manjal) in Malayalam. It’s a key ingredient in Ayurvedic remedies and is often used for its anti-inflammatory and antibacterial properties.
The Ayurvedic Legacy of Turmeric
In Kerala, Ayurveda is not just a form of alternative medicine; it’s a way of life that has been passed down through generations. Aushadi refers to medicinal plants and their therapeutic properties in Ayurvedic healing, and turmeric has earned its place as one of the most revered aushadis. In ancient texts, it’s often called “Haridra” and is considered a powerful rasayana (rejuvenating) herb with the ability to purify the body, reduce inflammation, and balance the doshas (Vata, Pitta, and Kapha).
Turmeric’s Role in Treating Acne
Acne is a common skin condition that affects many individuals, particularly teenagers and young adults. It occurs when hair follicles become clogged with oil, dead skin cells, and bacteria, leading to inflammation and the formation of pimples, cysts, and blackheads. Ayurvedic treatment for acne aims to balance the body’s internal energy and detoxify the skin.
In Kerala’s Ayurvedic tradition, turmeric has been used for centuries to treat various skin conditions, including acne. Here’s how turmeric works as a natural remedy for acne:
1. Anti-Inflammatory Properties
One of the primary reasons turmeric is used to treat acne in Ayurveda is its strong anti-inflammatory effects. The active compound in turmeric, curcumin, helps reduce inflammation and redness associated with acne. By calming the skin, turmeric prevents further irritation, reduces swelling, and aids in faster healing of blemishes.
2. Antibacterial Action
Turmeric’s natural antibacterial properties make it a powerful tool in fighting acne-causing bacteria. In Kerala, Ayurvedic practitioners often use turmeric to cleanse the skin and fight off infections. By reducing bacterial growth on the skin’s surface, turmeric helps prevent the formation of new pimples, blackheads, and cysts.
3. Promotes Healing and Scarring Reduction
Chronic acne often leads to scarring, which can be challenging to treat. Turmeric has been shown to accelerate the healing process, helping to fade dark spots and scars. It does this by promoting collagen production and improving skin regeneration. In Kerala, turmeric paste is commonly applied to acne scars and blemishes, facilitating faster recovery and clearer skin.
4. Balances Oil Production
Excessive oil production in the skin, particularly in the T-zone, is one of the leading causes of acne. Turmeric’s properties help regulate sebum production, reducing the likelihood of clogged pores. In Ayurvedic formulations from Kerala, turmeric is often combined with other herbs and ingredients like neem and sandalwood, which further control oil secretion and maintain the skin’s natural balance.
Traditional Uses of Turmeric in Kerala’s Ayurveda
In Kerala, turmeric is used in various forms in Ayurvedic skincare regimens. Here are some traditional methods:
1. Turmeric Paste for Acne Treatment
A common treatment involves creating a paste by mixing turmeric powder with a small amount of water, coconut oil, or milk. This paste is applied directly to the affected areas of the skin. The anti-inflammatory and antibacterial properties of turmeric help treat existing acne and prevent new breakouts.
2. Turmeric and Neem Face Packs
Neem, another herb known for its antibacterial and antifungal properties, is often combined with turmeric in Kerala’s traditional acne treatments. A paste made from crushed neem leaves and turmeric is applied to the skin to clear up acne and soothe inflammation. This combination not only tackles acne but also helps to detoxify the skin.
3. Turmeric Milk (Golden Milk)
In Kerala, Haldi doodh (turmeric milk) is a traditional remedy for numerous health concerns, including acne. Drinking warm turmeric milk is believed to cleanse the body from the inside out, promoting skin health and reducing acne breakouts. The antioxidants in turmeric and the anti-inflammatory properties of milk work together to enhance skin clarity and overall wellness.
4. Turmeric Oil
In some Ayurvedic practices, turmeric essential oil is used for its anti-inflammatory and healing benefits. It can be diluted with a carrier oil like coconut or almond oil and gently massaged into the skin. This practice helps reduce the inflammation associated with acne and promotes healthy, glowing skin.
Scientific Validation of Turmeric’s Skin Benefits
Modern science has started to catch up with the ancient Ayurvedic knowledge regarding turmeric’s effects on acne. Studies have shown that curcumin, the active compound in turmeric, has significant anti-inflammatory and antimicrobial properties, making it effective in treating acne. Research has also demonstrated that turmeric can help reduce sebum production and promote wound healing, supporting its use in Ayurvedic acne treatments.
A Final Word of Caution
While turmeric can be a highly beneficial remedy for acne, it’s important to note that not all individuals may respond the same way to topical or internal turmeric treatments.
Some people may experience allergic reactions or skin irritation. As with any natural remedy, it’s advisable to perform a patch test before using turmeric on the face, especially for those with sensitive skin.
Disclaimer: This article is for informational purposes only and should not be considered as medical advice. For personalized recommendations and treatment for acne or other skin conditions, it’s essential to consult with a healthcare provider or dermatologist. Always consult with a medical professional before starting any new treatment regimen, especially if you have underlying skin conditions or allergies.
Turmeric, long regarded as a golden remedy in Kerala’s Aushadi Ayurveda, is a powerful natural tool in the fight against acne. Its anti-inflammatory, antibacterial, and skin-healing properties make it an effective treatment for managing acne and reducing scars and promoting healthy, glowing skin. By incorporating turmeric into your skincare routine, you can harness the wisdom of centuries-old Ayurvedic traditions to achieve clearer, more balanced skin.
Lower Cortisol Levels with a Cup of Green Tea! Here’s Why
In today’s fast-paced world, stress has become a constant companion for many. From work pressures to personal challenges, our bodies often find themselves in a heightened state of alertness, leading to the release of cortisol, the “stress hormone.” While cortisol plays an essential role in managing stress and regulating various body functions, prolonged or elevated levels can have adverse effects on health, including anxiety, weight gain, and immune system suppression. Fortunately, natural remedies like green tea may help manage cortisol levels effectively.
The Adrenal Glands: Cortisol’s Origin
Cortisol is produced by the adrenal cortex, the outer part of the adrenal glands located above each kidney. This hormone is released as part of the body’s natural stress response. The adrenal medulla, the inner part of the adrenal glands, produces “fight-or-flight” hormones like adrenaline and noradrenaline, which prepare the body to handle immediate threats.
Understanding the difference between these functions highlights the intricate ways in which our body manages stress and maintains balance.
Understanding Cortisol and Its Impact on the Body
Cortisol is a steroid hormone with crucial roles in the body. It helps regulate metabolism, supports immune function, and maintains the sleep-wake cycle. While these roles are essential, chronic stress can lead to prolonged high cortisol levels, which may cause adverse effects.
Is Cortisol Good or Bad?
Cortisol is a double-edged sword. In small, controlled amounts, it is vital for survival—helping you wake up in the morning, respond to stressful situations, and maintain energy throughout the day. However, in today’s world, where stressors like tight deadlines, exam pressures, financial concerns, or even missing a train are daily occurrences, cortisol levels often remain elevated for longer than intended, leading to potential health issues.
Common Effects of Elevated Cortisol Levels
Increased abdominal fat and weight gain
Sleep disturbances and insomnia
Decreased immune function
Higher blood pressure
Anxiety and depression
Prolonged cortisol elevation affects not only your physical health but also your emotional well-being. Learning how to manage this hormone is crucial in today’s demanding lifestyle.
Green Tea and Its Potential to Lower Cortisol
Green tea has been extensively studied for its numerous health benefits, including its ability to reduce cortisol levels. Its unique composition of bioactive compounds, particularly L-theanine and catechins, plays a significant role in stress management.
1. L-theanine: The Relaxation Amino Acid
L-theanine, a rare amino acid found in green tea, promotes relaxation without causing drowsiness. It works by increasing levels of neurotransmitters such as serotonin, dopamine, and GABA, which collectively improve mood, reduce stress, and promote a sense of calm.
Research Insight: Studies have shown that L-theanine can help lower cortisol levels during stressful situations. For example, a study published in the Biological Psychology Journal demonstrated reduced cortisol production and enhanced relaxation in participants who consumed L-theanine.
Catechins, such as epigallocatechin gallate (EGCG), are potent antioxidants found in green tea. These compounds reduce inflammation, oxidative stress, and cortisol production. They also protect cells from damage caused by prolonged stress.
Research Insight: A study in the Journal of Nutritional Biochemistry revealed that catechins can modulate the body’s stress response, helping to regulate cortisol levels.
Green tea supports stress management in more ways than one. Beyond its bioactive compounds, the act of sipping a warm cup of tea can activate the parasympathetic nervous system, which counteracts the fight-or-flight response and promotes relaxation.
Research Insight: A study published in the Journal of Clinical Psychopharmacology found that participants consuming green tea extract experienced lower cortisol levels during stressful tasks, making it a natural ally in managing stress.
Additional Health Benefits of Green Tea
In addition to reducing cortisol, green tea offers a wide range of health benefits:
Improved brain function: The combination of caffeine and L-theanine enhances focus and cognitive performance.
Weight management: Catechins boost metabolism and aid fat oxidation.
Reduced risk of chronic diseases: Regular consumption lowers the risk of heart disease, Type 2 diabetes, and certain cancers.
Improved immunity: Antioxidants in green tea strengthen the immune system.
Green tea, with its powerful combination of L-theanine and catechins, provides a natural way to manage cortisol levels and combat the negative effects of stress. By incorporating green tea into your routine and adopting other stress-management practices like meditation, exercise, and balanced nutrition, you can support your mental and physical well-being.
However, it’s important to note that while green tea is beneficial, it is not a standalone solution. Chronic stress and elevated cortisol levels may require holistic intervention and, in some cases, professional guidance.
This article is for informational purposes only and is not a substitute for medical advice. Always consult a healthcare professional before significantly changing your diet or lifestyle.
Sometimes, the simplest solutions come from age-old wisdom. Your mom might have told you, “Eat a banana; it’ll calm your nerves,” and as it turns out, she’s on to something. Bananas are not just a quick, healthy snack—they’re also packed with nutrients that may help reduce anxiety.
In this blog, we’ll explore how bananas can aid in managing anxiety, the science behind their calming effects, and how to incorporate this humble fruit into your daily diet to support mental well-being.
How Bananas Help with Anxiety
Rich in Vitamin B6 Bananas are an excellent source of vitamin B6, which plays a key role in producing neurotransmitters like serotonin and dopamine. These “feel-good” chemicals regulate mood and promote relaxation, helping to combat anxiety.
Boosts Serotonin Naturally While bananas don’t contain serotonin themselves, their high tryptophan content acts as a precursor for serotonin production in the brain. Serotonin helps regulate mood, reduce stress, and improve sleep quality—factors directly linked to anxiety relief.
Regulates Blood Sugar Levels Anxiety can sometimes be exacerbated by blood sugar fluctuations. The natural sugars in bananas, combined with their fiber content, provide a steady energy release, preventing the spikes and crashes that might worsen anxiety symptoms.
High in Magnesium Magnesium is a well-known mineral for calming the nervous system. A medium-sized banana contains around 32 mg of magnesium, which helps reduce stress and promote relaxation. Studies have linked low magnesium levels to increased anxiety, making bananas a great way to replenish this essential nutrient.
Packed with Potassium Anxiety can elevate blood pressure and cause heart palpitations. Potassium in bananas helps regulate blood pressure and maintain a steady heartbeat, counteracting the physical symptoms of anxiety.
Acts as a Quick Energy Source Fatigue and low energy can exacerbate feelings of anxiety. Bananas are a natural energy booster, providing quick yet sustained energy to help you stay alert and focused without triggering stress.
Ways to Incorporate Bananas Into Your Diet
As a Snack: Simply peel and eat a banana when you feel stressed or anxious.
In Smoothies: Blend a banana with almond milk, a handful of spinach, and a spoonful of peanut butter for a calming, nutrient-packed smoothie.
With Oatmeal: Slice a banana over your morning oatmeal to start your day with a serotonin boost.
As a Dessert: Freeze banana slices and blend them to create a creamy, sugar-free “nice cream.”
With Nut Butter: Spread peanut or almond butter on a banana for a quick, anxiety-busting snack.
The Science-Backed Benefits
Numerous studies support the anxiety-relieving benefits of bananas:
A 2021 review published in Nutrients highlights the role of tryptophan and vitamin B6 in enhancing serotonin synthesis, leading to mood improvement.
Research in Magnesium Research found that individuals with anxiety often have low magnesium levels, and increasing magnesium intake can significantly reduce symptoms.
A study in the Journal of Hypertension noted the effectiveness of potassium-rich foods like bananas in lowering stress-induced blood pressure spikes.
When Bananas Might Not Be Suitable
While bananas are a natural remedy for anxiety, they may not suit everyone:
People with Diabetes: Due to their natural sugars, bananas should be consumed in moderation by individuals with diabetes.
Allergies: Though rare, some people may be allergic to bananas and should avoid them.
Gastrointestinal Issues: If you have irritable bowel syndrome (IBS) or sensitivity to certain fruits, bananas might trigger bloating or discomfort.
Conclusion
Bananas are more than just a convenient fruit—they’re a powerhouse of nutrients that support mental health and alleviate anxiety. Whether it’s their vitamin B6 boosting serotonin, their magnesium calming your nerves, or their potassium regulating your heart rate, bananas offer a simple, natural way to manage stress.
So, the next time anxiety strikes, take your mom’s advice, grab a banana, and let this nutrient-packed fruit work its magic. Sometimes, the best remedies come from nature—and our moms!
The Secret of Kombucha Tea to Cure Stomach Pain: A Refreshing Remedy Backed by Science
Kombucha tea, a fermented drink made from sweetened tea and a symbiotic culture of bacteria and yeast (SCOBY), has been gaining attention in the wellness world.
One of the key benefits touted by many is its ability to soothe stomach pain and improve digestion. But how exactly does it work, and what is the scientific backing behind its digestive benefits?
The Science Behind Kombucha’s Soothing Effect on Stomach Pain
Kombucha is rich in probiotics, which are beneficial bacteria that help balance the gut microbiome. A healthy gut microbiome is essential for proper digestion and immune function. The probiotics in kombucha can help restore the balance of good bacteria in the gut, which may reduce bloating, gas, and discomfort associated with digestive issues.
Kombucha also contains acetic acid, which is formed during fermentation and has been shown to have antimicrobial properties. This may help in neutralizing harmful bacteria in the digestive tract, contributing to an overall healthier stomach environment.
Additionally, kombucha is a source of organic acids, enzymes, and bioactive compounds that may support the breakdown of food in the stomach and enhance nutrient absorption. Some studies have suggested that the polyphenols and antioxidants present in kombucha, particularly from green or black tea, can also reduce inflammation, which is often a root cause of digestive discomfort.
How to Make Kombucha Tea: A Simple Recipe
Ingredients:
1 cup of organic black or green tea (loose leaf or tea bags)
1 cup of white sugar (for fermentation)
1 SCOBY (Symbiotic Culture of Bacteria and Yeast)
4 cups of water
1 cup of unflavored kombucha (from a previous batch or store-bought to start the fermentation)
Instructions:
Prepare the Tea: Boil 4 cups of water. Add the tea and let it steep for about 10 minutes. Afterward, remove the tea bags or strain out the loose leaves.
Add Sugar: Stir in 1 cup of sugar into the hot tea until it completely dissolves. Allow the tea to cool to room temperature.
Fermentation: Once the tea has cooled, pour it into a glass jar (about 1 quart in size). Add 1 cup of starter kombucha and then gently place the SCOBY into the jar.
Cover and Ferment: Cover the jar with a clean cloth or paper towel and secure it with a rubber band. Let the tea ferment at room temperature for 7-14 days, depending on the taste you prefer. The longer it ferments, the more tangy and acidic it will become.
Bottle and Enjoy: After fermentation, remove the SCOBY and store it for your next batch. You can bottle the kombucha and refrigerate it. Some people like to add fruits or herbs for flavor before bottling.
Note: If you are new to kombucha, start with small amounts (about 4 ounces a day) to allow your body to adjust to the probiotics and avoid potential stomach upset.
When Not to Take Kombucha
While kombucha can offer significant health benefits, there are certain situations where it might not be suitable:
Sensitivity to Caffeine or Sugar: Kombucha contains small amounts of caffeine from the tea and sugar used during fermentation. If you’re sensitive to either of these, it may cause discomfort or agitation.
Weakened Immune System: If you have a compromised immune system or a serious underlying health condition, the probiotics in kombucha may not be suitable, as they could cause an adverse reaction.
Digestive Issues (Severe): If you suffer from severe gastrointestinal issues, such as Crohn’s disease or ulcerative colitis, kombucha may cause bloating, gas, or irritation due to its fermentation and acidity. Always consult a doctor before introducing it to your diet.
Pregnancy and Breastfeeding: While kombucha is generally considered safe for most people, pregnant or breastfeeding women should consult their healthcare provider before consuming it regularly, as the alcohol content from fermentation, though minimal, might be a concern.
Final Thoughts
Kombucha tea can be a soothing and refreshing way to support your digestive health, thanks to its probiotic content and other beneficial compounds. By balancing your gut microbiome and providing organic acids, kombucha has the potential to ease stomach discomfort. However, as with any health remedy, it’s essential to be mindful of your personal health status and consult a healthcare professional when in doubt.
With the simple recipe above, you can try making kombucha at home, tailoring it to your taste preferences while enjoying its digestive benefits. So, next time you’re feeling bloated or dealing with stomach pain, reach for a glass of kombucha and give your gut the support it needs!
Discover the Magic of Apricot for Glowing Skin: A Natural and Chemical-Free Remedy
Introduction: Why We Care About Our Skin
As teenagers or young adults, it’s natural to be concerned about our appearance. Whether we want to attract someone or simply feel good about ourselves, having healthy, glowing skin can make a huge difference. The beauty industry offers countless products promising radiant skin, but many of these are filled with chemicals that could potentially harm your skin in the long run.
Reading labels, researching ingredients, and avoiding harmful chemicals can be overwhelming, not to mention expensive. Sometimes, we just want something simple, effective, and affordable—a remedy that works wonders without the added baggage of side effects. That’s where traditional wisdom comes in.
One of the most powerful natural remedies I’ve ever come across is something my mother taught me when I was little: an apricot-based skincare treatment. In Hindi, apricot is known as “khubani”, and this humble fruit is packed with skin-nourishing properties. It’s easily available, budget-friendly, and most importantly, completely natural.
In this blog, I’ll take you through the benefits of apricot for the skin, how to use it effectively, and some additional tips for radiant, healthy skin.
Why Choose Apricot for Skincare?
Apricot is a superfruit when it comes to skincare, offering a plethora of benefits:
Rich in Antioxidants: Apricots are loaded with vitamins A, C, and E, which protect the skin from free radical damage and slow down the aging process.
Gentle Exfoliation: The natural enzymes and fine granules in apricots make them an excellent exfoliating agent, removing dead skin cells without causing irritation.
Hydration Booster: Apricots are rich in water content and natural oils, which help lock in moisture, leaving the skin soft and supple.
Skin Brightening: The high vitamin C content in apricots helps reduce dark spots and pigmentation, giving the skin a natural glow.
Anti-Inflammatory Properties: Apricots can help soothe skin irritation, reduce redness, and calm acne-prone skin.
Natural Glow: Regular use of apricot-based remedies can improve skin tone and texture, making it look fresh and youthful.
Who Should Avoid Apricot Remedies?
While apricot-based remedies work wonders for many, they may not be suitable for everyone. Here’s who should be cautious:
Allergic Individuals:
If you have a known allergy to apricots or other stone fruits (like peaches, plums, or cherries), avoid using apricot-based products.
Highly Sensitive Skin:
If your skin is prone to irritation or reacts negatively to natural acids, test the remedy on a small patch of skin first.
Open Wounds or Severe Acne:
Avoid using apricot scrubs or masks on areas with open cuts, wounds, or severe acne, as the granules might aggravate the condition.
Specific Skin Conditions:
People with eczema, rosacea, or psoriasis should consult a dermatologist before using any new remedy, including natural ones.
When to Consult a Doctor
While natural remedies can work wonders, they are not a substitute for medical treatment. Here are some situations where you should seek professional advice:
Persistent Skin Issues:
If you have chronic acne, hyperpigmentation, or other skin conditions that don’t improve with home remedies.
Severe Reactions:
If you experience redness, itching, or swelling after using apricot remedies, stop immediately and consult a dermatologist.
Underlying Health Concerns:
Sometimes, skin issues are a reflection of internal health problems such as hormonal imbalances, nutrient deficiencies, or allergies. A doctor can help identify and address these root causes.
Customized Skincare:
If you’re unsure about what works best for your skin type, a dermatologist can guide you toward the right treatments.
Disclaimer
This blog is for informational purposes only and should not be considered medical advice. Natural remedies like the apricot treatment may provide excellent results, but they are not guaranteed to work for everyone. Always consult a healthcare professional or dermatologist before trying new remedies, especially if you have sensitive skin, allergies, or underlying medical conditions.
Let’s dive into the simple apricot-based remedy my mother taught me. This natural treatment can be used as a face scrub, mask, or even as a moisturizing serum.
Optional: A pinch of turmeric (for additional anti-inflammatory benefits)
Steps to Prepare:
Prepare the Apricots:
If you’re using fresh apricots, wash them thoroughly, remove the seeds, and scoop out the pulp.
If you’re using dried apricots, soak them in warm water for 30 minutes to soften them, then blend them into a smooth paste.
Mix the Ingredients:
In a small bowl, combine the apricot pulp with honey, yogurt, and rose water. Add a pinch of turmeric if desired.
Mix until the ingredients form a smooth, creamy consistency.
Apply the Mask:
Cleanse your face with lukewarm water to open up your pores.
Apply the apricot mask evenly across your face and neck, avoiding the eye area.
Relax and Let It Work:
Leave the mask on for 15–20 minutes. Use this time to relax, meditate, or listen to your favorite playlist.
Exfoliate and Rinse:
Before washing it off, gently massage your skin in circular motions to exfoliate.
Rinse with lukewarm water and pat your skin dry with a soft towel.
Moisturize:
Follow up with a natural moisturizer or a few drops of almond or coconut oil for added hydration.
The Science Behind Apricot Skincare
To understand why this remedy works so well, let’s take a closer look at the nutrients found in apricots:
Vitamin A (Retinol):
Helps reduce acne and promotes skin cell regeneration.
Vitamin C:
Brightens skin, reduces dark spots, and boosts collagen production.
Vitamin E:
Provides deep hydration and protects the skin from UV damage.
Natural Enzymes:
These gently exfoliate and remove dead skin cells, revealing a brighter complexion.
Essential Fatty Acids:
Found in apricot kernel oil, these nourish the skin and improve elasticity.
Conclusion
The beauty of apricot-based remedies lies in their simplicity, effectiveness, and affordability. By using natural ingredients like apricots, honey, and yogurt, you can achieve glowing, healthy skin without exposing yourself to harmful chemicals. However, it’s important to recognize when natural remedies are enough and when professional help is needed.
Always listen to your skin and seek advice from a dermatologist when necessary. With the right balance of natural remedies, proper skincare, and medical guidance, you’ll be well on your way to achieving radiant, youthful skin.